Just wanted to let you know about a new video on my YouTube with a invitation to craft along with me. Just print the freebie and let's create a folding magnifying glass together!
This Monday La-La Land Crafts Design Team shares with your their cards for the theme "Things with Wheels".
For making my card I used the wheel from the Bicycle Die:
How cute is this bunch of apes, too? You can find the link to a clear stamp with the apes, and the links to additional products that I used today, below:
Another week is here and I have a La-La Land Crafts simple card to share with you. I used a cute bear from the Crafty Friends Clear Stamp Set and colored it as a panda. I love how he turned out!!
Once colored, this bunny look so different from what he was before! I added more details to the eyes and also drew the eyebrows for him.
I attached a string to the pocket watch, to make it look more interesting:
I also really like the flower pot centers as decorative additions to any card, they don't tie you down to a certain theme and that's what makes them so great!
The rabbit was colored with Copics:
Rabbit's Body: C7, C5, C3, C1
Nose: C3, R43, R20
Eyes: B16
Hearts: E09, E07, R24
Yellow: E37, Y387, Y18
White: B41, W0
Thanks for stopping by and have a successful week! Take care.
I am beyond excited today, to finally let you know about the launch of a very cool project that I have been working on for Vectoria Designs.
There are so many crafters who like nature and create nature themed journals or ephemera! Vectoria Design has numerous nature/botanical themed paper collection already, but what is special about the project that we are going to start working on today, is that it will unite 4 themes in it, once complete.
The first theme is 𐀔 Butterflies 𐀔.
The digital papers (they are SO beautiful, aren't they!?), are available for purchase below :
Temporary offer with DELUXE kits at a discount/launch price (valid until Mar 17, 2023) is HERE.
Here is the so called "journaling station" and we are going to put all 4 future journals in it.
The "station" will have 2 drawers that you can fill with smaller things/ephemera/stationery:
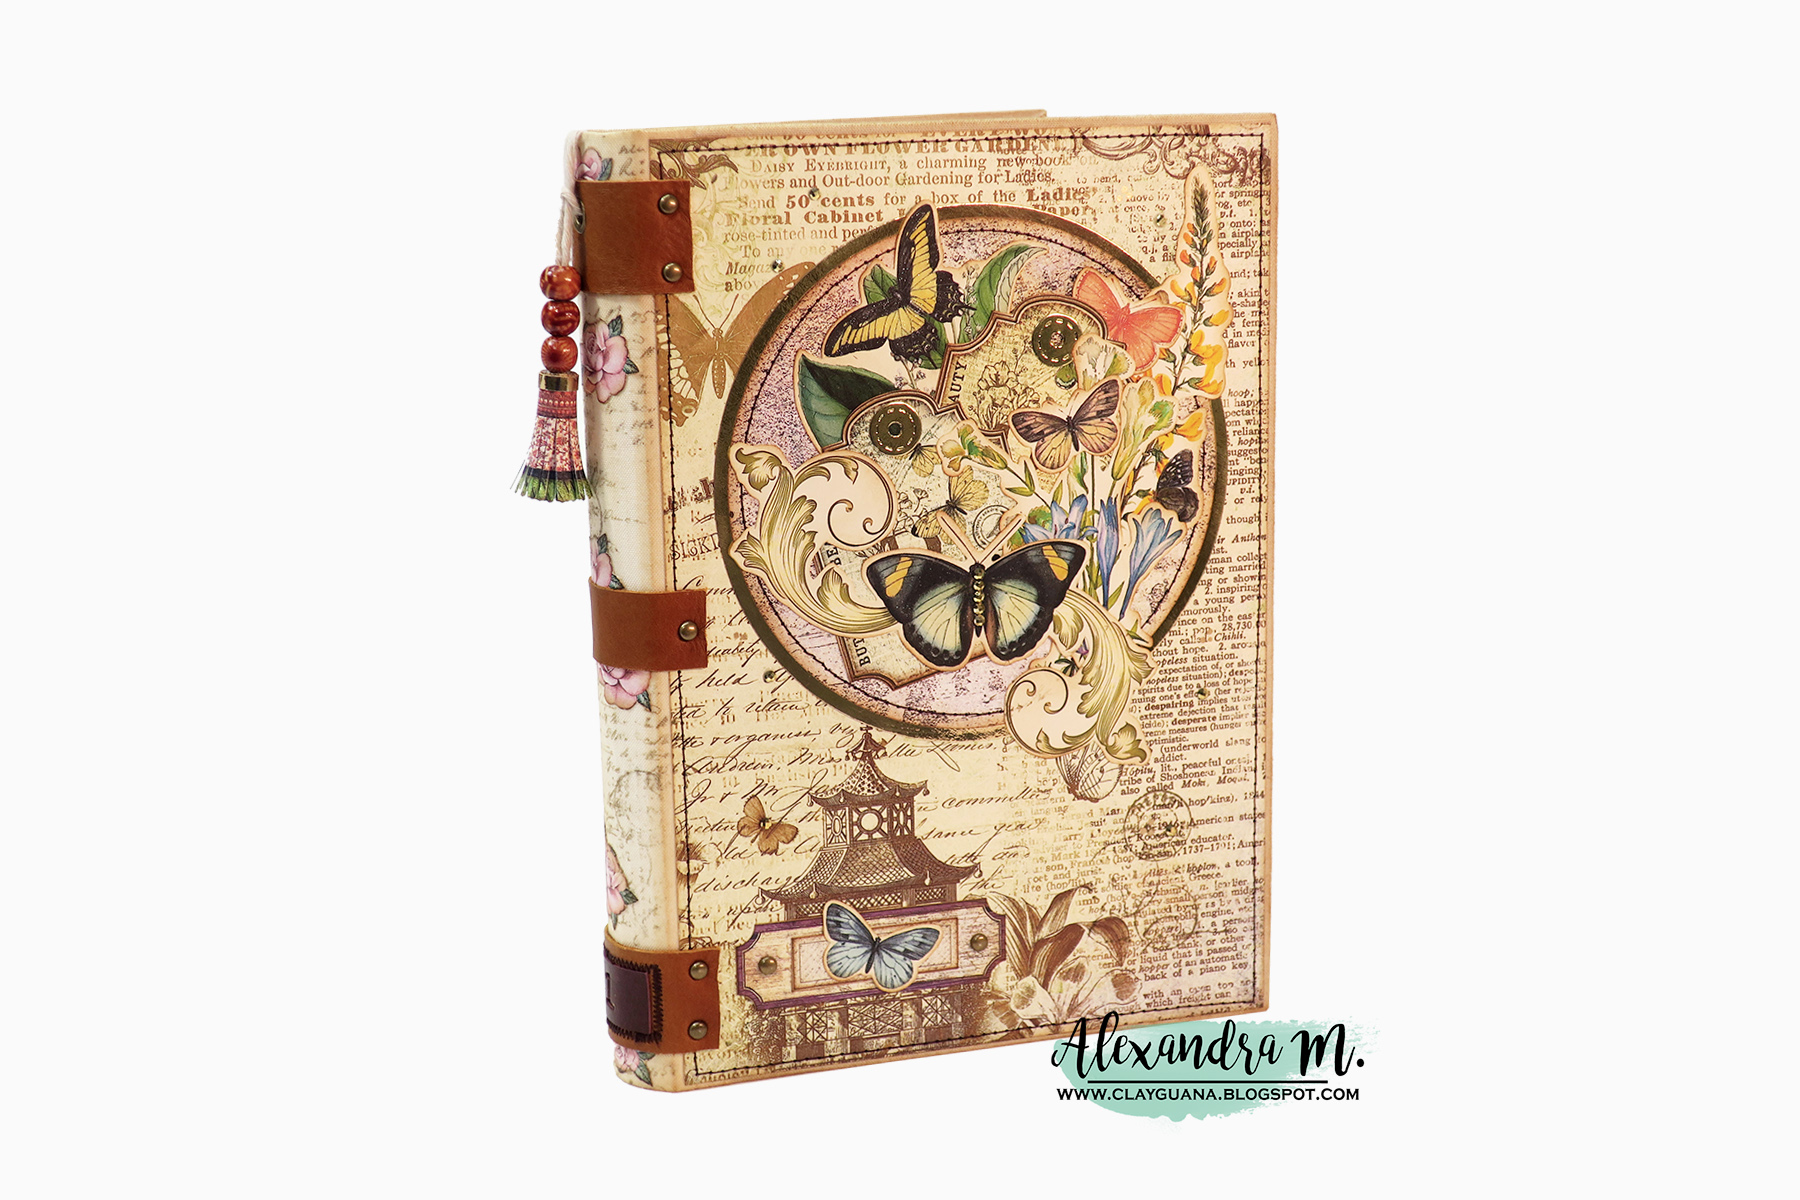
A journal number 1 is ready and on its place inside the station's compartment:
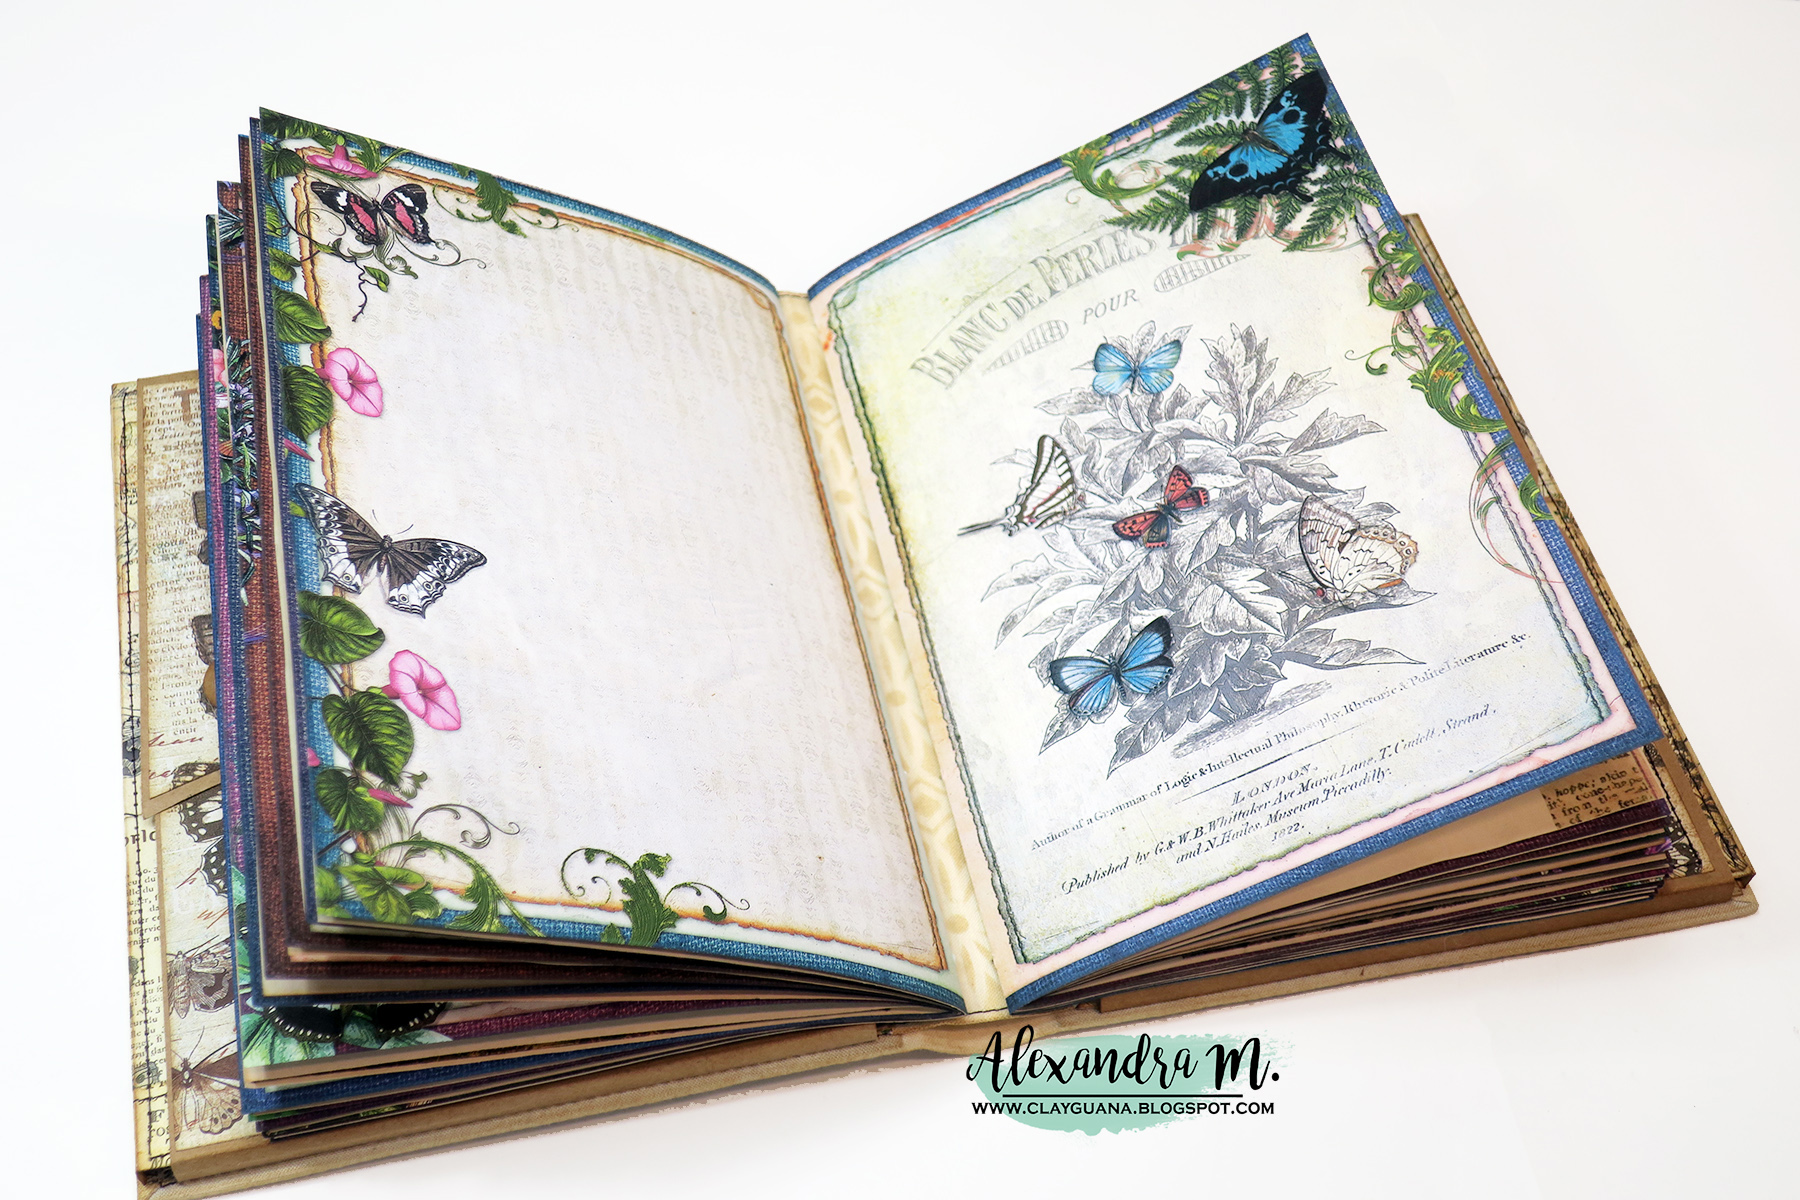
There is an astonishing amount of butterflies on the journal's pages and all of them are beautiful! Hence the name of the collection - Butterfly Beauty :)
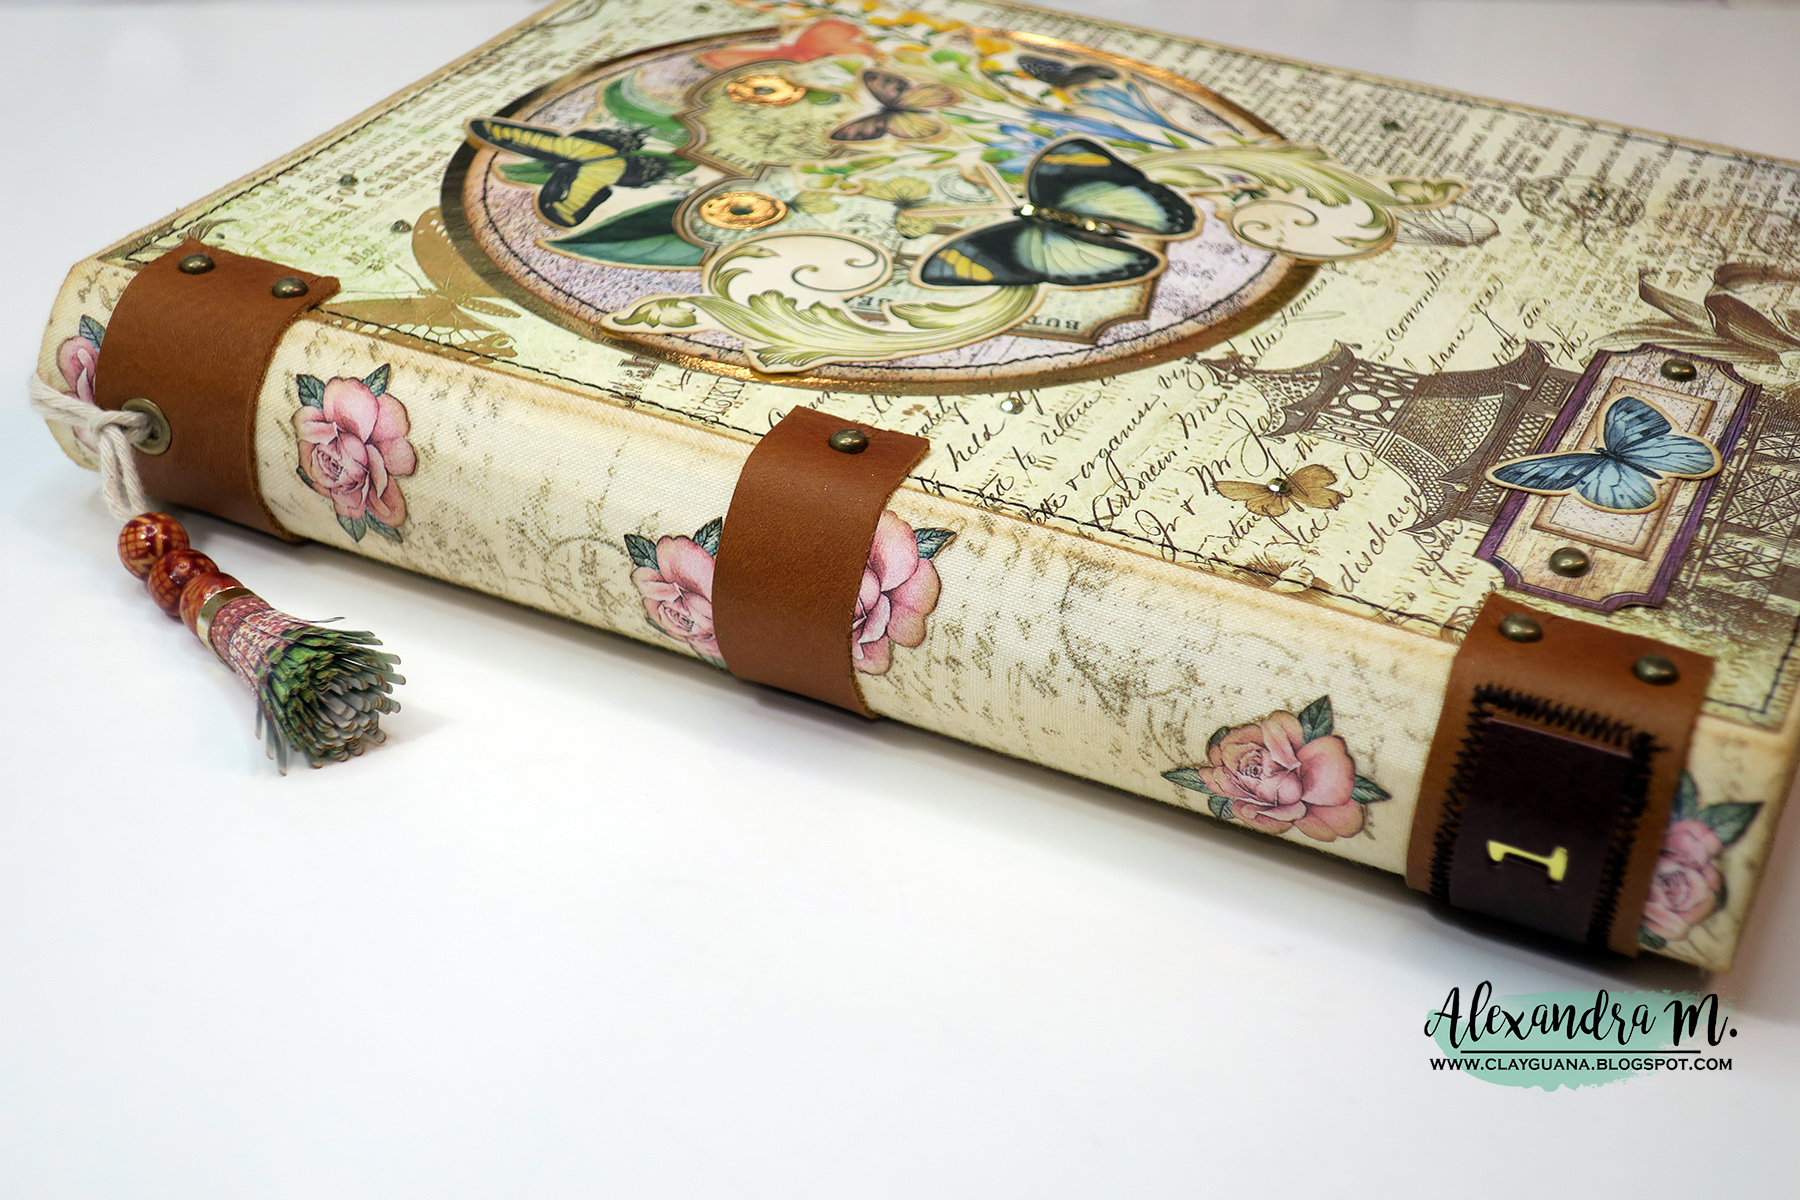
Here are some more details of the cover:
And the spine:
Next, come numerous photos of the inside pages, as well as flaps and pockets on the inside of the front and back covers of the journal (click each picture to enlarge):
If you'd like to join me, please watch the video tutorials.
Everything is created from scratch and I hope the explanation of the process is clear enough for anyone who wants to try his/her hand at the project of this kind.
Here are the links to the first set of video tutorials (Butterfly Beauty Collection):