Tuesday, April 28, 2020

La-La Land Crafts Spring 2020 New Release - Day 4

Hello!

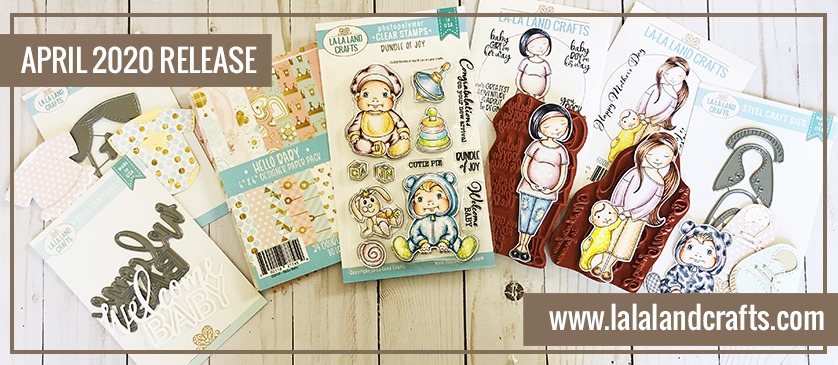
If you saw my yesterday's post, you already know that the April 2020 release is now available at the La-La Land Crafts store, featuring 2 themes - Motherhood and Spring.

On this 4th day of the release showcase, I wanted to share a card that I made using the 'Mona with Baby' stamp:


I am so in love with the new dies - 'Baby Shoe' and 'Onesie'! 

[I did not separate the lace off the part of the baby shoe die the first time I used it, and I added my cord lace to the shoes as you can see below, but you can use it both ways - cord/thread lace or paper ones]:


Here's the full list of the LLLC products that I used for creating my card:


The stamped image was colored with the Copic markers:
Skin: E04, E11, E00, E000
Mona’s Hair: E47, E44, E43, E42
Mona’s Outfit: RV99, RV95, RV93, RV91
                           R85, R83, R81, R00
                           W5, W3, W1, W0
Baby Onesie: R85, R83, R81, R00
                         RV99, RV95, RV93, RV91

Thank you for stopping by! I hope your day will be joyful and sunny. Please take care and be well! 


Monday, April 27, 2020

La-La Land Crafts Spring 2020 New Release - Day 3

Hello dear all!

April 2020 release from La-La Land Crafts is now available in the store and the design team has been sharing their projects created with the new products for a couple of days now. Today is the 
'Day 3' of the showcase. 

It's probably worth mentioning that the new release is about two themes - Motherhood and Spring:


The card that I wanted to shared today is featuring the motherhood theme:


Although my card measures 6X6", the images from this new "Bundle of Joy" set can be used on smaller cards too. These fun cute babies are smaller than Marci, Luka and other [non-animal] La-La Land Crafts characters, which is very convenient, if you look for an image to color and create a quick card with. 


There's this new Welcome Baby Die, which can be cut apart or used as is, being glued to the card directly or backed on a transparent piece of acetate, which will give it more stability:


The stamped image was colored with the Copic markers:
Skin: E04, E11, E00, E000
Overall: BG18, BG15, BG13, BG11
Shoes: E44, E43, E42, E41
Bib: Y28, Y04, Y00
Grey Shades: W5, W3, W1, W0


Below you can find the list of the LLLC products that I used for creating my card:


I hope you found something in the release that caught your eye! Have a nice week!


Monday, April 13, 2020

Thinking of You - La-La Land Crafts Card

Hello everyone!

Another week of quarantine... Who could believe it!?

Our inspiration theme of the week over the La-La Land Crafts blog is "Thinking of You" and I have a new card to share:


I adore this stamp set with the cute pandas! They can be used for many occasions, which makes this set a 'must have' in your collection.


Here is the full list of the La-La Land Crafts Products used:

For coloring the little panda I've used Karin Brush Markers:
Black, Skin 1, Pale Pink


Please take care and stay positive during the days of worldwide quarantine madness. Don't forget to craft and keep yourself sane :)


Monday, April 6, 2020

A Paper Trunk - Tutorial for La-La Land Crafts

Hi there!

Today I am stopping by with a simple tutorial for creating a little paper trunk for sweet treats that all of us like to give to friends and kids on Easter.


La-La Land Crafts Products Used in the tutorial:
Hello Life paper pad
Easter Bunny Digital Stamp
Best of Cluck Clear Stamp Set
Suitcase Box Die

Once you prep all the pieces, the trunk is really easy to put together. Let's begin!

Step 1:
Cut a piece of the base card stock in 6.5" X 7.5", score at 2" on all four sides. Then cut out triangular sections as shown below:


Fold the middle flaps and cut 1/4" from the left pair of the remaining flaps, as well as 1/4" from the right pair of the unfolded flaps:


Apply scortape on the flaps as shown below:


Step 2:
Cut another piece of base card stock, measuring 5 1/4" X 4.5".
On the short side of the piece score at 0.5" & 4".
On the long side score at 0.5" > 1 5/8" > 3 1/8" > 4 1/4" > 4 3/4". 

Apply scortape along the 0.5" sections, then cut out little triangles in between the future flaps. Refer to the picture below:


Step 3:
Cut two pieces of card stock measuring 2.5 X 1.5". On each of the pieces, mark 0.5" inwards from the top left and top right corners, as well as 0.5" upwards from the bottom left and right corners. Snip off the triangular sections as shown below:


Step 4:
Connect together all the card stock pieces. The base of our trunk is ready:


Step 5:
Embellish the trunk base with the designer paper of your choice. I am using the "Hello Life" paper set by La-La Land Crafts.
** Mind the direction of the paper as you are gluing the pieces down.


Step 6:
For creating a handle, I used a piece of cardstock measuring 2 7/8" X 1", as well as a piece of the designer paper (layered on top). Designer paper was cut with the help of the 'stitched tab die' from the 'Suitcase Box Die' set:


Attach the handle to the trunk, using metal brads:


Step 7:
Next, I cut out a couple more decorative elements, using La-La Land Crafts dies listed below:
Stitched Nested Circles Die (second smallest)
Suitcase Box Die (corner covers)

Assemble the corner covers and set them aside for now. 


Step 8:
Glue the circles onto one pair of half doilies, then glue them down to the trunk side panels as shown below:


Step 9:
Assemble the trunk. Start from the bottom, and then proceed with assembling the lid.


When assembling the lid, align the flaps along the center trapezium shape. 


The trunk is ready now, but it keeps opening. We will fix that now :)


Step 10:
Cut a piece of cardstock measuring 7.5" X 2.5". Score at 0.5" on the short side and at 2" & 5.5" on the long side. Apply scortape only to the 2" area, snip the corners from both sides  of the 0.5" area as shown:


Glue this support piece inside the trunk:


It's done now! You can add colored images or other embellishments according to your taste. I added a paper tassel to the front of the lid:


And of course, I had to color some of the cute little La-La Land Crafts images for the front of the trunk.

A bunny is a FREE DIGITAL STAMP that can be found here, and the chick is from the clear stamp set called Best of Cluck.


And here is another trunk with a slightly different look. Inside the trunk I put a tiny (ATC size) greeting card with a cute koala bear holding a heart (In My Heart Clear Stamp Set):


Thank you for watching! Be well and happy Easter!