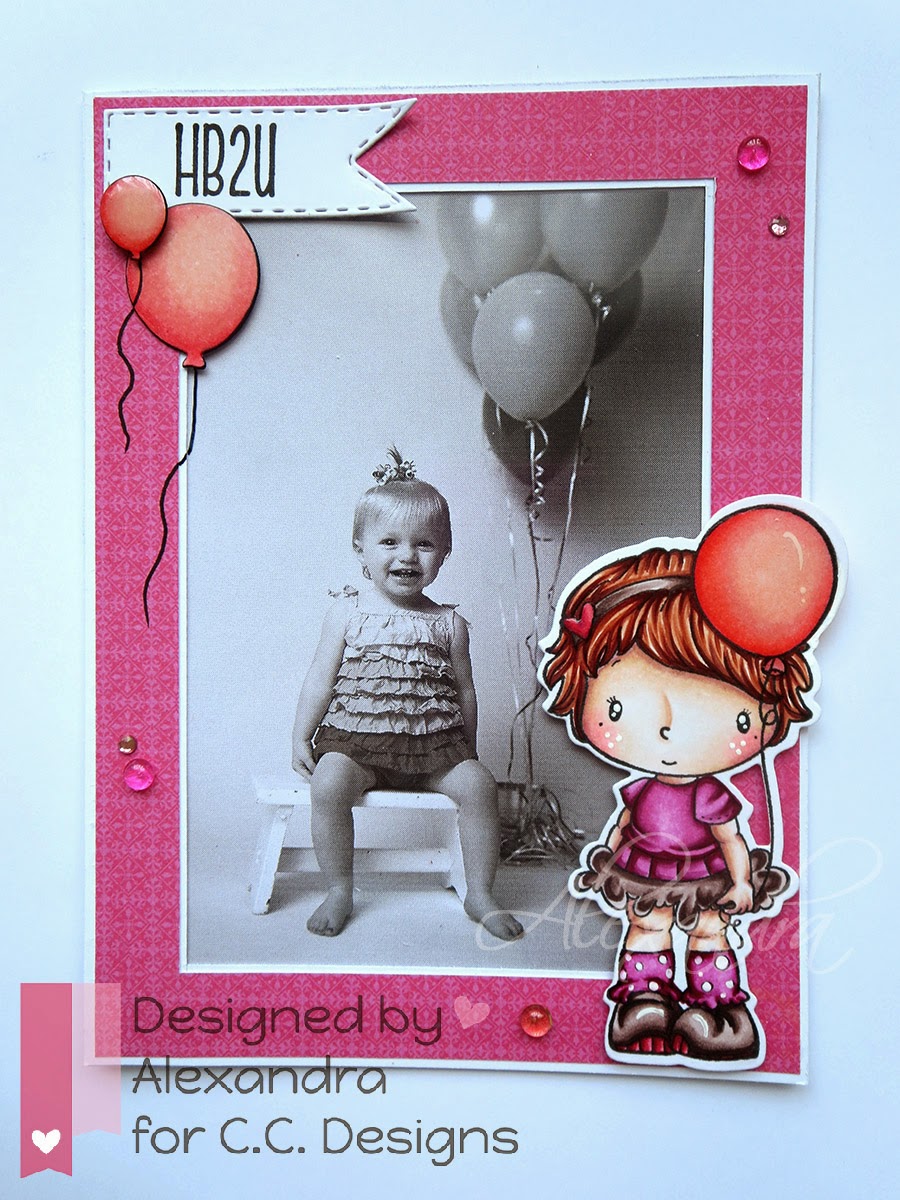
Hello everyone!
At the C.C.Designs blog Monday means a tutorial, so today it’s
my turn to share with you some technique, or hint or anything else crafty.
I decided to write quick instructions on creating a simple
frame for a 3.5” X 5 1/8” (or 9cm X 13cm) photo. The final result will look
like this (yes, all the way CAS):
To start, you’ll need 3 pieces of cardstock measuring 4.5” X
6 1/8”.
Using any circle punch (or even a die) from those you have, punch a half circle on top of one of the pieces (this will make the process of taking the photo out of the frame easier):
One the second piece draw a frame as shown below:
And on the third draw the guide lines with the measurements shown below:
Cut out the inside of the third piece:
Apply some wet glue on the back of it and glue down to the third piece of cardstock (the one with the half circle). Pay attention to the sides, align them properly.
Now we'll need an acetate sheet measuring 5 3/4" x 3 3/4". Apply 1/8" score tape on the three sides of the acetate as shown below:
Before gluing it to the frame base, remove the tape backing from the acetate:
Apply wet glue on the sides and glue the third cardstock on top, aligning the sides properly:
Since we've glued several layers of paper together and sometimes the knives in our trimmers are not very sharp, I recommend using a sanding block for taking care of any uneven or a bit fluffy edges:
The most of the work is done now. Prepare a piece of a designer paper of your choice, measuring 4 3/8" X 6":
Draw the frame on the back side of the designer paper as shown and cut the inside out:
I used the stamp from the C.C.Designs recent (April 2015) release, called "Rose With Balloon" and the accompanying outline die (which comes with the cutest little balloons as well). To make the balloons thicker I glued two layers together and to match the colors on the stamp, I used the same Copics and colored them both:
Rose is colored with Copics:
Skin: E04, E11, E21, E00, E0000 + RV21
Hair: E11, E15, E18
Skirt: E79, E77, E74, E71, E70
Shirt: RV69, RV66, RV55
Balloon: R35, R32, R30
And here is the result again:
The sentiment is from the new set by Amy R - HB2U.
I hope you'll find this tutorial useful.
PS. - I took a picture of a girl from here.
Thanks for visiting!
Hugs,
Alexandra


Wooow! Lovely tutorial and lovely frame sweetie :)
ReplyDeleteXxx