Tuesday, July 30, 2013

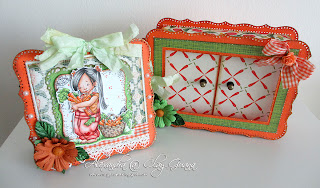
3-D Box with Double Sliding Top

04/08/2013 - This set was chosen in TOP3 @ 613 Avenue
07/08/2013 - This set was a winner @ Fab 'n' Funky Challenges

Hello dear friends!

How are you today? Hope everyone is feeling fine.

As some of you may (or may not) know, I love boxes :) In this post I'm sharing a new 3D box with double sliding top I've made, based on the tutorial written by Tara, and a matching card, with a wonderful image by Mo Manning - Carolina.


The digital stamp is colored with Copic markers of the following colors:
Skin: E000, E00, E21, E11, R20, E50
Hair: W7, W5, W3, W1
Carrots: YR18, YR04, YR02, YR000; YG67, YG45, YG23
Overall: R08, R05, R02, R000, T3
T-Shirt: YR24, YR15, YR12, YR01


I added lots of Stickles glitter on the card in general, and made some accents on the carrots. The basket is covered with Glossy Accents.


There are two tags with an embossed butterfly on them.


The inside decoration:


The back:


I wanted to say a couple of words about the tutorial. It is very precise and I had fun following it, though when the box was finished, I didn't like that the lids fall out of the box, and I thought of adding a slight enhancement to the original design.

Before gluing down the top decorated element, focus for another minute on the sliding lid parts.


Cut 4 pieces of card stock measuring 1" X 2". Score each of them 1/4" on the shorter sides and attach a score to these flaps. Then, adhere the hinges on the lids' back sides as shown below:


Place both of the lids so that the hinges will be located in the spaces between the bigger and the smaller boxes:


Now you are ready to glue down the upper decorative piece:


Thank you all for visiting me today!

I'm entering this piece into the following challenges:
1. Make a Set @ Fab n Funky
2. Summer @ Crafty Creations
3. Fancy Edges @ Let's Create
4. Anything Goes @ Avenue 613
5. Anything Goes @ Eclectic Ellapu
6. Summer @ Creative Belli blog
7. Summer Days @ Dream Valley Challenge

Wednesday, July 24, 2013

Expandable Box - Make a Wish

06/08/2013 - This box was chosen in TOP3 @ Top Tip Tuesday

Hello lovely peeps!

Some time ago I came across this cute tutorial here on how to make a small expandable box, so I though I'd give it a try. When the box was finished it definitely needed an image topper and I decided to use Mo Manning "Make a Wish".

Here you can see how these two ended up together :)


The image is colored with Copic markers (as usual):
Skin: E0000, E000, E00, E21, E11, R20
Hair: E50, E53, E55, E57, E59
Skirt: RV91, RV93, RV95, RV99 + Y15
T-Shirt + Sneakers: YR02, YR01, YR20, YR00, YR000; W5, W3, W1, W0


The view from the top when open:


After the "expansion" :)


The box has a magnetic closure and is secure to put things inside:


I would like to enter this into the following challenges:
1. Cute cute cute @ Lej Designs
2. Anything Goes @ Bearly Mine Chalenges
3. Anything Goes @ Krafty Girls
4. Spooled Items @ Top Tip Tuesday (ribbon)
5. Anything Goes @ Word Art Wednesday
6. Anything Goes @ The Paper Shelter
7. Anything Goes @ Crafts & Me Challenges

Thank you so much for visiting! Have a lovely day!

Monday, July 22, 2013

Hip Hurray Tilda - Tags and Pockets

Hello bloggers!

Hope each of you is felling well, you had a great weekend and are full of energy. Today a new challenge is setting off @ Inky Chicks Challenge blog. The theme is "Summer Colors". How do you see summer? Which colors are your favorite summer ones?

I thought a lot, and couldn't choose only one, so my creation has a lot of colors, like a rainbow :)

I used a Magnolia stamp called "Hip Hurray Tilda" from the "Special Moments" 2013 collection, and created not a card, but a kind of booklet. When several friends want to present a card for another friend, and each one of them want his own place to write a sentiment, this booklet is the best thing! There are 4 tags in it for 4 people to fill in with warm words. This is how the booklet looks on the front:


For coloring I used the following Copics:
Skin: E0000, E000, E00, E21, E11, E13, R20
Hair: Y21, YR23, E15, E18
Pants + Balloon:  BV000, BV02, BV13, BV08
T-Shirt: BG000, BG01, BG05, BG09
Shoes: T6, T4, T3, T1


The booklet measures 3.5" X 5.5". The first flap of the pages looks as follows:


The second:


The tags on the top may be pulled out:


The pockets with the butterflies have another 2 tags:


The whole construction looks like this (top view):


And here is the back side:


The papers I used are from the Basic Grey 6X6 paper pad "Kneehighs". All the pages i n it are very colorful and summery.

That's it for today. Hope you'll join us for the challenge at Inky Chicks!


In my turn, I would like to participate in the following challenges:
1. Sparkle & Bling @ Stamping for the Weekend
2. "L" for Lace @ Alphabet Challenge
3. Tags @ Divas by Design
4. Let it Sparkle @ Creative Corner Challenges
5. Ribbon & Bling @ Creative Inspirations Paint
6. Bingo @ Lovely Hanglar (Lace-Pearls-Dies)
7. Challenge #62Fussy and Fancy @ Tilda's Town
8. Challenge 49 Floral @ Crafting When We Can
9. Summer Sizzler @ Country View Crafts
10. Challenge 108 Summer Fun @ Wags 'n Whiskers

Thank you so much for visiting!!

Friday, July 19, 2013

Sweet Nothings Mini Album

Hello!

Today I'm sharing another mini album, a very basic one, with 6 pages and not too many flaps and secret pockets, really simple and not intended for "playing around" while looking at the photos :)

All the pages are build in the same way, so I won't be posting the pictures of each and every one of them.

For creating the album, I've used a 6X6 paper stack by KaiserCraft "Sweet Nothings". Here is the album's front cover:


On the spine I've attached a piece of a chain and placed beads and charms on it:


The front, the spine and the back cover:


A couple of pages from the inside (each page is also a pocket and has a big photo mat inside):


Close-ups of the front cover:


Side view:


The back cover:


That's all! Hope you like it :)