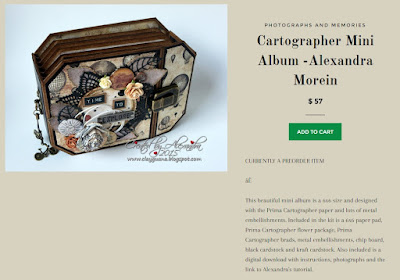
Wanted to let you know that there's a kit available (with a tutorial too) for making my ticket-shaped mini album, using the Prima Cartographer paper collection.
**If you are interested in purchasing the video instruction without purchasing the kit, it's possible. You can do it by pressing the "Buy Now" button below. Once the payments is received you will get 3 links to the 3 parts of the video tutorial, in which I guide you step-by-step how to create the album**
(The links will be e-mailed to you within 12 hours from the payment)
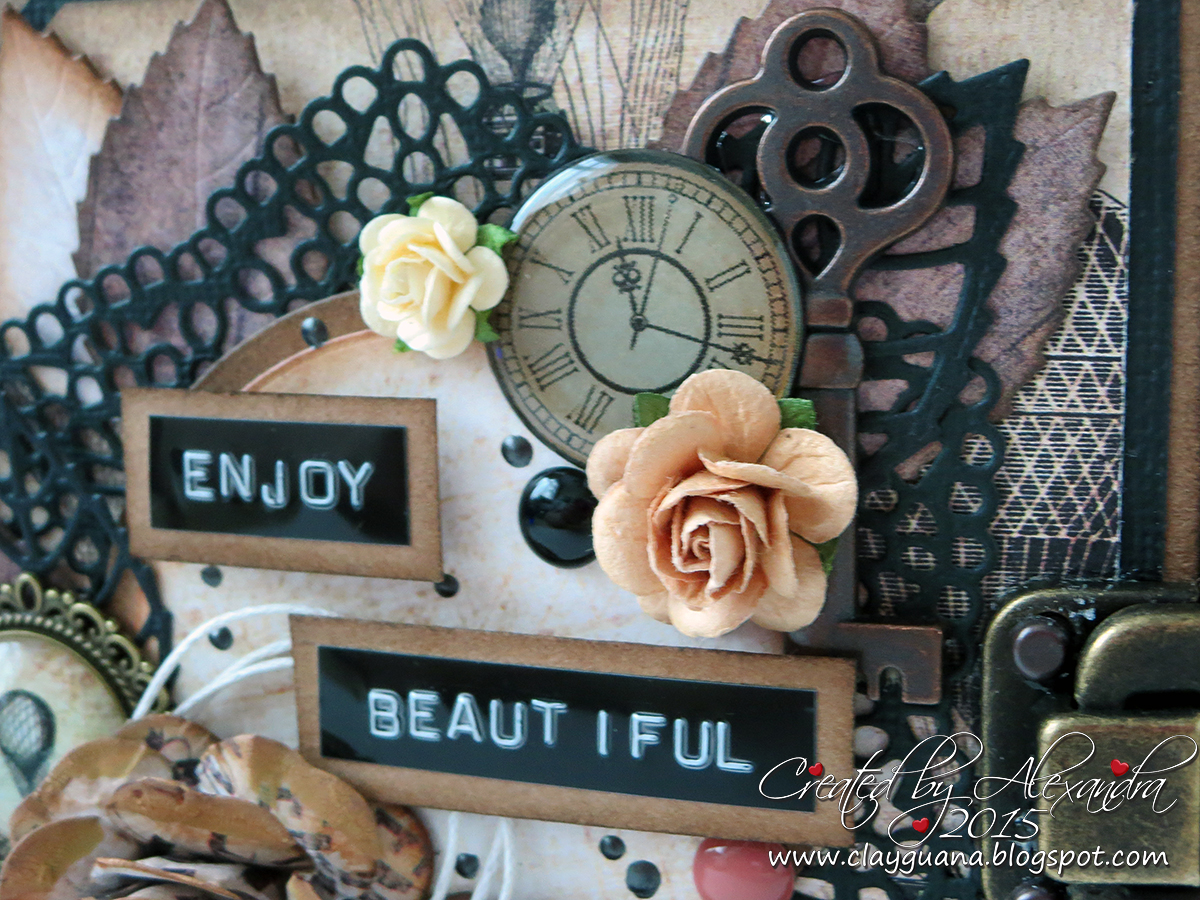
Here are several pictures of the albums I created:
Several views of the details:
Inside views:
You can get the kit from the "Photographs and Memories" store here:
The links to the video tutorial (which includes 3 parts) will be sent to you after the purchase.
Before I move to the projects I have to share with you today, I want to thank to all of the people who have recently joined to follow my blog, as well as to all of those who have been following and supporting me for a while. Thanks for all of the comments you leave on my posts, they truly get me moving forward and inspire to create new things.
I want to wish all of you a Happy New Year. May your beloved people, friends and family be joyful, healthy and happy! May the upcoming year bring along only good things and a lot of inspiration :)
Now, several explanations about the Club Kits:
- they are exclusive, secret & based on a monthly subscription :)
- there are three purchase plans for your subscriptions:
a) Stamp kit (you get only the stamps from the kit);
b) Product kit (you get both the stamps and the dies from the kit);
c) Project kit (you get the stamps, the dies and the supplies needed for putting up a few
pre-designed projects);
- the kits' dies and stamps will not be available for purchasing as separate items until one year after the kit'a release.
You can find all the information and arrange your subscription here.
The kits are usually revealed in the beginning of every month. December kit is so adorable! Here's what it includes:
Finally, here are two of my projects, created with the December 2015 Product Club Kits.
The first is an altered recipe box:
I had a wooden box from the "Jacks" game and it originally looked like this:
I decided to leave a sliding lid and to add a flip lid from cardboard on top. It's connected to the base of the box with a paper hinge and has a magnet closure, which holds the sliding lid in place.
Marci on top of the box is placed inside a shaker window. I've put some silver glass beads and acetate hearts inside.
The rolling pin and the whisk were a total fun to play with. I used a piece of silver tape to create the bottom part of the whisk and to make the rolling pin look a bit more real, I stamped some wooden texture on top.
The second project I created using the same product kit, is a card:
I used the Carta Bella papers from the "Home Sweet Home" collection.
Marci is colored with Copics: Skin: E04, E11, E00, E000, E0000 Hair: E25, YR23, YR21, E02 Bowl: W6, W5, W3 Dough: E43, E53, E51 Marci's Outfit: BG09, BG07, BG05, BG01, BG000
W4, R22, R21, R20, R11
I'm in love with this cute kit! There are so many recipe journals and cooking booklets that you can create with it!
You cannot really see it on the picture, but the video might show the dimension on this card, which I created, mounting several layers of paper on top of each other with the foam tape.
Here's a short video where I show you both of the projects and the dies from the kit. I hope you like it.
would like to wish you and your loved ones a Very Merry Christmas from our Family to Yours!
As we ring in the New Year we will start with CHA, introducing more NEW PRODUCTS than we've ever done before!
This beautiful Christmas ornament was created with one of the many new dies that will be released in just a couple of weeks.
We are so excited we have celebrations already lined up!!
We want you to have a chance to win some of these EXCITING NEW PRODUCTS!
Now, we would like you to meet our Family of Designers who create our beautiful cards for the inspiration blog. We Laugh together, Play jokes on each other, and lean on each other through hard times. Some of our Family even design products for LDRS Creative.
Stay tuned to sneak peaks and product release announcements!
WELCOME! to the I Am Roses "Winter Wonderland" Blog Hop.
Hello everyone! There will be no challenge this month but we have a fabulous "end of the year" blog hop for you. We'd like to THANK YOU from the bottom of our hearts for all your support! There will be not one but TWO Prize Packages up for grabs, woohoo!
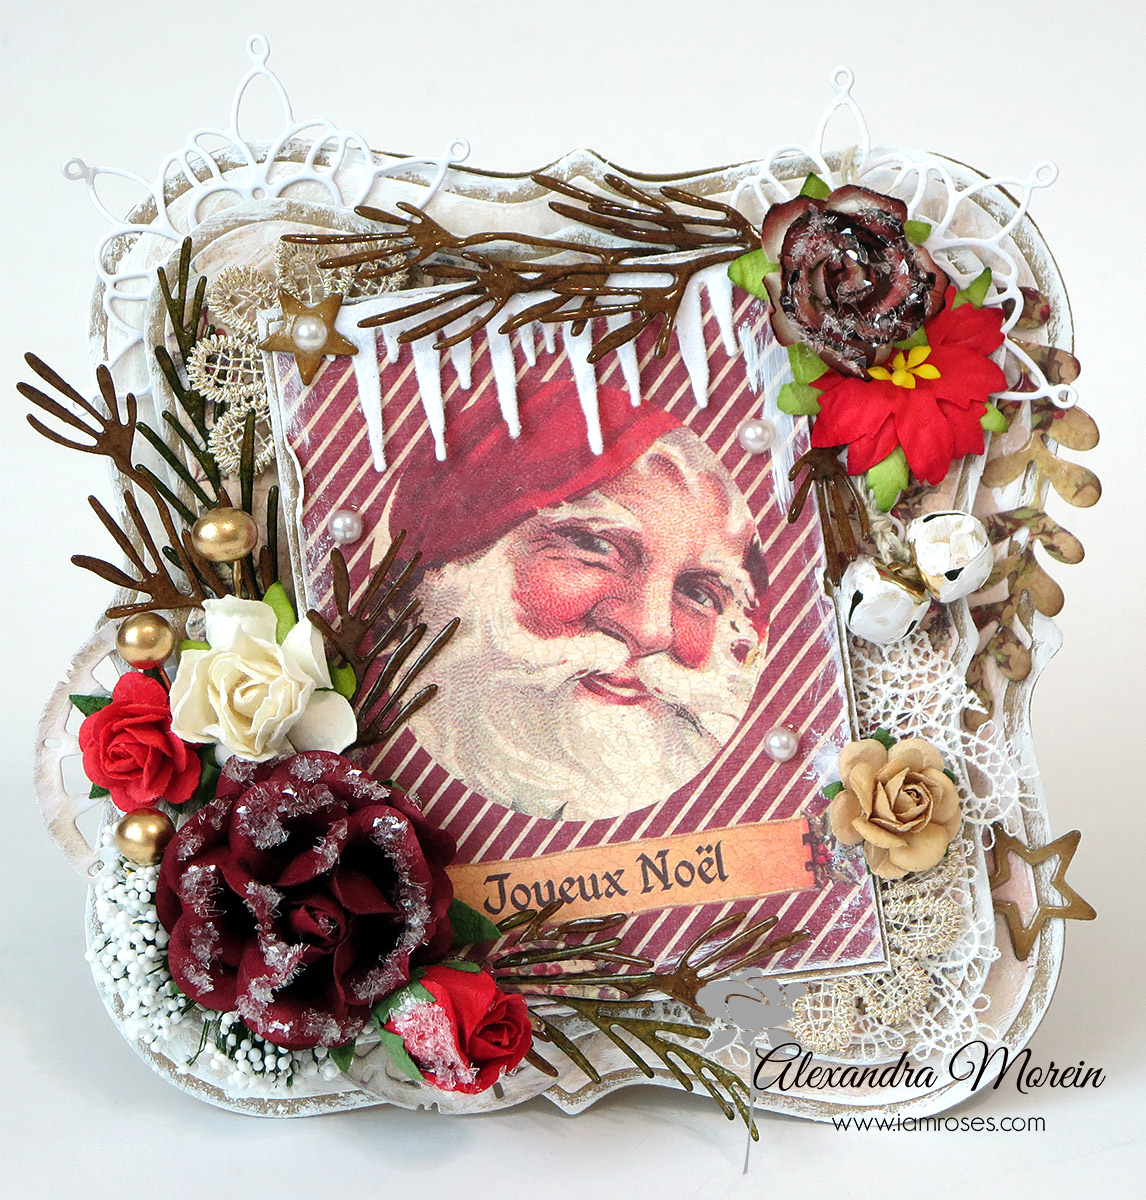
Here's a card I created using the flowers from I Am Roses, some Prima papers from the Victorian Christmas collection and the dies from Magnolia Doohickey club vol.7:
To make all the delicate branches' die-cuts firmer, I covered them with UTEE (Ultra Thick Embossing Enamel), the icicles are covered with clear Rock Candy Glitter (although it's hard to get the sparkle on the picture). I also added the Twinklets Diamond Dust to several of the flowers.
So.... Are you ready to win some beautiful I Am Roses flowers?
Here’s how for your chance to win:
Hop
along to each of the Designers’ blogs and be sure
to comment on their individual "Winter Wonderland” Blog Post
There are 2 HIDDEN BLOG CANDY PRIZES up for grabs in TWO of our Hoppers’ blogs!
Commenting along the way highly increases your chance of winning a prize package.
Comments will be CLOSED on 11:59pm PST on Monday,
December 21st (This blog hop has a duration of one week)
We will be randomly selecting 2 winners from the comments on two of the blogs and will announce the winners here on the I Am Roses Challenge Blog on Christmas Day!
Here is the line up of the I Am Roses Design Team:
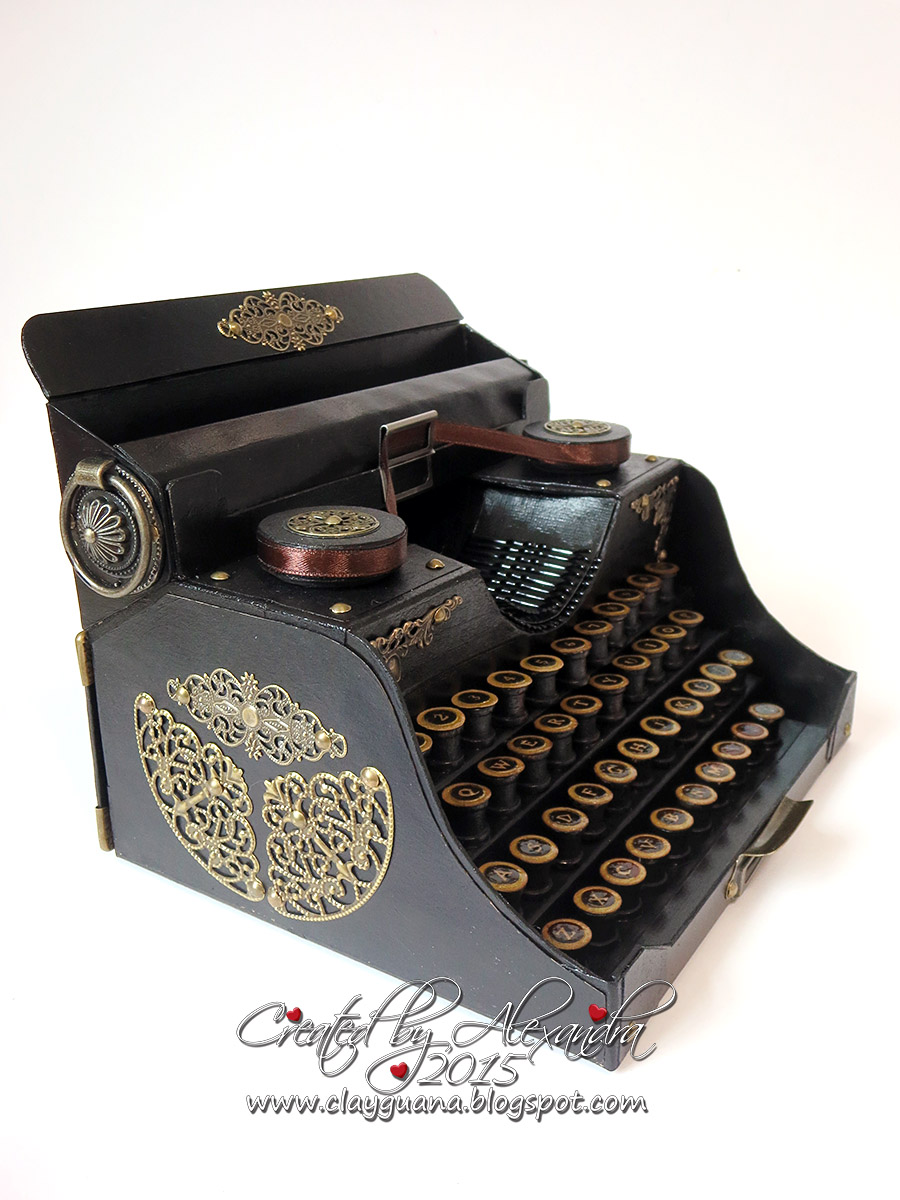
I'm so very exited about finishing this project! Now I have a vintage typewriter, made completely from scratch using Kathy Orta's tutorial.
I wanted to make this for so long, and the tutorial which I purchased, has been waiting for a couple of months. The typewriter took me 3 evenings to put together and today I'm sharing with you the result.
I used a lot of metal embellishments on the typewriter. Luckily I had the needed amount (42) of mini spools to create the type keys. The bobby pins which I was able to find in the local store happened to be too short (about 2" long), while it would look much better if they were 3".
Kathy suggests to make separators in the drawer for some calendar pockets, but I decided to create a vintage looking book instead. Used some 'Paper Artsy' stamps on the cover.
Here's a close up of the keys:
And here are some more pics of the book. I used Laura Denison's 'stack the deck' binding technique for the very first time!! Can you believe that? I needed the gaps of 1/8"between the pocket pages of the book, so hidden hinge (in my opinion) was not very good for that.
It measures 7" X 4" X 3/4" and has 6 pocket pages with a tag in each one of them.
Still didn't stamp anything on the tags:
That's all. Here is the link to the video presentation of the typewriter:
And here are the links to the metal embellishments which I used: