Tuesday, September 18, 2018

Two Projects with the Tonic Craft Kit 13

Hello!

My today's post will be dedicated to the Tonic Craft Kit 13 which I had a chance to try and work with. I need to mention that I until now I did not have  any of the Tonic Studios dies, and I was pleasantly surprised with their quality. 


On You Tube you can find numerous videos of un-boxing this kit, as well as various inspirational tutorials which give you an idea about using the kit in many different ways.

Tonic Craft Kit 13 contained:
Gift Card Box Die Set
Gift Card Holder Die Set
Gift Card Stamp Set
Classic Card - French Blue
Pearlescent Card - Navy Dazzle 
Speciality Papers - Crushed Metal 
6x6 Card Pack - December Skies
Mini Glitter Drop - Dazzling Blue 
Mini Crystal Drop - Liquid Mercury 
Mini Glimmer Paste - Moonstone
Glitter Pot - Silver Tinsel
Mica Mist - Nebula Blue
Surprise Gift (this time these were the Glitter Markers)
Craft Kit Sticker

The dies in this kit were designed to let you create a gift card holder in the shape of a box. I used it as planned, but added a shaker feature to the box.


My second project features mostly the dies from the Tonic Craft Kit 13, other than the rest of the goodies which were in the kit. I made a little vintage style notebook and you can have a look at it here:


There is a lot of stamping in the notebook, as well as using the die cut shapes as masks and creating interesting patterns with them.


You can view the process of putting both of the project together in the video below. I hope it will give you some ideas about using the kit #13 (if you already own one), inspiration for making something with other kits or just encourage you to subscribe for the next kits, which are always a surprise :)


Purchase the Tonic Craft Kit Here
UK & Rest of the World - https://toniccraftkit.co.uk/ 

Have a great day!


Pink Halloween - La-La Land Crafts

Hello!

Have you seen the new stamp set "Batty For You" from La-La Land Crafts? These are bats are super cute!

 Here is my card with one of them:


You can view all of the LLLC products featured on this card below:
Batty For you
So Many Dots
Double Stitched Circles
Stitched Nested Circles
Stitched Elements
Cobweb
Filigree Pumpkin

Copics colored that I used:
RV19, RV17, RV14, RV11 + T6, T4


I really like the filigree pumpkins die. Ans it cuts so well!


Have a fang-tastic day!

I Am Roses September Challenge Inspiration

Hello dear friends!

We are having a new Anything Goes Challenge over the I Am Roses blog and once again invite you to take part, submit your cards and win beautiful I Am Roses flowers.

Here is my inspiration for you:


I've used the following flowers:

Stay cozy wherever you are and have a sunny day!


Monday, September 17, 2018

A Sea Turtle Pin Cushion and a Sewing Organizer

Hello dear all!

From to time now I like to sew. My today's post will be dedicated to one of the sewing projects. 

As I am fairly new to this field of crafting {and I don't know really how much time and effort I will need to invest in it, in order to be able to say "Yes, I can sew"}, I learn a lot from watching video tutorials on You Tube.

The video tutorial for the project that I want to share with you today, can be found here

Once I saw that cute sea turtle, I got super inspired and sat down to work. It always amazes me how simple things can look like in the video tutorial, and how challenging can actually be completing a project.
I am not showing you the first turtle that I made :) I kinda see my pattern here - only from the second try I am able to get a decent result. 


One more thing that I understood for myself is that taking pictures of the sewn projects is more difficult for me than photographing the paper ones. Will try to work on that too.


From a seemingly simple tutorial you can learn a lot! How to make a stuffed toy, how to sew a zipper, how to do patchwork, how to attach a binding to an oval shape, etc. 

This is how the turtle looks like without the shell:


On the inside of the shell there is a zipper compartment, as well as a place for the scissors and another little pocket for a pack of spare needles. 

The original tutorial only had one pocket for scissors, so this is my little input to the overall project idea.


As the turtle is stuffed with a fiber fill, it can of course be used as a pin cushion.


Loved this project and just had to share it with you! Thank you Lin for your tutorial!


Monday, September 10, 2018

I Am Roses Inspiration Card

Hello!

Have you seen that the Challenge rules over the I Am Roses blog have changed and you can use now any flowers from any brand on your projects and still get a chance at winning some of the gorgeous I Am Roses flowers? You have a few days left to enter the Anything Goes August Challenge, or take part in the upcoming challenges too!

Here is my flowery inspiration for today:


I've used the following I Am Roses flowers:
R77-00
R5-2
LY3-624
R8-00
S10-166
S10-275

The paper that I chose for completing this card is by Fabrika Decoru, from the the collection "Wedding of Our Dream".

The chipboard that you see under the flowers is by Studio Prosto Nebo.


To make a card look more interesting, I've sprinkled glitter all over the flowers. They shine amazingly beautiful in the beam of sunshine.


Thanks for visiting me today!

September 2018 Release from La-La Land Crafts

Hello everyone!

I am a seldom guest now here on my blog, right? Well, from time to time I do create things and today I would like to share a couple of cards made with the products from the new September 2018 release by La-La Land Crafts. The release is all about Halloween, it includes >>>>>> 

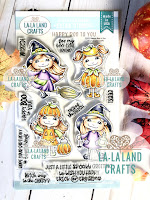
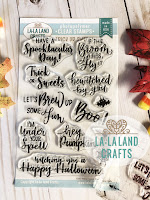
3 new CLEAR photo polymer Stamp Sets

 HAPPY BOO TO YOU     Trick or Sweets     Batty for You

2 RUBBER stamps

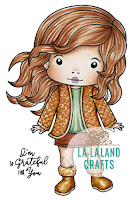
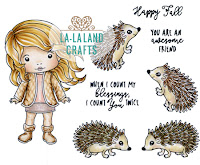
 Autumn Marci      Happy Fall

7 DIES


The first card that I made is featuring the adorable little witch:


Here is the list of the items that I used to complete the card:
NEW! Happy Boo to You Clear Stamps
NEW! Trick or Sweets Clear Stamps
NEW! Filigree Pumpkins
NEW! Halloween
NEW! Leaves Confetti
Spiderweb and Spider
Nested Frames Small
Nested Frames Large


The stamped image was colored with Copic markers:
Skin: E04, E11, E00, E000
Hair: E18, E15, E11
Dress: E09, YR18, YR16, YR14
Apron: V09, V06, V04
Hat: N9, N7, N5, N3
Broom: E57, E55, E53
             E77, E74, E71


Next is a CAS card, featuring a cute bat from the "Batty for You" set:


NEW! Batty for You Clear Stamps
NEW! Trick or Sweets Clear Stamps
NEW! Boo!
NEW! Twigs
NEW! Leaves Confetti

The Copic markers that I used for coloring the bat are as follows:
N10, N8, N6, N4, N2

And the third one is a card with the sweet Autumn Marci:


I love her hair! It was a treat to color!


Skin: E04, E11, E01, E000
Hair: E59, E57, E55, E51
Skirt: E44, E43, E42, E41
Jacket: T8. T6, T4, T2
T-Shirt: W6, YR07, YR04, YR02
Boots: E44, E43, E42, E41
           T8. T6, T4, T2


You can have a look at the cards by the rest of the Team Monday girls in this post over the La-La Land Crafts blog.

Thanks for stopping by and may all of  you have a great crafty week!