


Hello dear friends!
Today is my turn to post a tutorial over the La-La Land crafts blog.

I wanted to give you an idea about an alternative way of adding an interactive pull-out message tab to your cards.
Of course, it is always possible to stamp a sentiment on a tag and then tuck it behind the layers of the card... But.... I noticed that many times the receivers of the card, pull the tag out and then do not understand how to put it back, they don't get between which layers exactly the tag was originally placed, and this results eventually in losing it.
To prevent that from happening, I will show you how to create a tab which will be permanently held inside the card, and still will be able to move in and out :)
Once you get the idea, you can of course play with the measurements and adjust them to each one of the specific projects that you are working on.
Let's start with a base for our card. In my case it is a white card stock and it measures 5.5" X 11", and it is scored at 5.5" on the long side:

We will need one more piece of the white card stock, measuring 5 3/8" X 5 3/8". Once you have it ready, let's draw a few guidelines on it.
You'll begin with the 4 guidelines standing 3/4" away from each one of the card stock's sides.
Next, on the right hand side of the piece you will draw 2 short horizontal guidelines, standing 0.5" away from the top and the bottom 3/4" lines.
Then, on the left hand side, you will draw two short vertical guidelines, standing 0.5" from the left 3/4" line. They will have to be 5/8" in length.
Finally, let's draw 2 more horizontal lines at the top and at the bottom, standing 5/8" away from the top and bottom 3/4" guidelines.
You can view the image below and get a better idea about how it should look like at this stage.

Let's cut the tab out and create a "housing" for it, based on the guidelines which we drew just now. I've rounded the corners of the tab on one side:

This is how the whole construction works, when you move the tab to the right hand side. The tab stays in place and cannot be pulled out completely due to the "stoppers" that we created for it:

Prepare a piece of the designer paper of your choice, measuring 5 3/8" X 5 3/8". Put the tab aside, and let's work now on two of the following pieces:

Apply glue to the white frame and glue the designer paper on top of it, making sure that you align everything straight.

This is what we have right now:

Now let's get back to the tab. Cut a piece of the designer paper, measuring 4" X 2.5". Round the corners of this piece. (I have a single sided designer paper):

Stamp a sentiment of your choice onto the designer paper. Glue it down to the white tab base. Add a decorative pull tab on the right hand side.

Flip the designer paper piece (which has a frame attached to it) to the back side and apply glue as shown below:

Flip the message tab to the back side and position it in place, making sure that it doesn't touch the glue on the frame. Hold everything together with your fingers and flip to the front side. Glue the whole construction down to the card base, leaving a 1/8" border on all of the 4 sides.

This is what you will have so far:

Check that the interactive tab is not stuck in between the paper layers and can be pulled out:

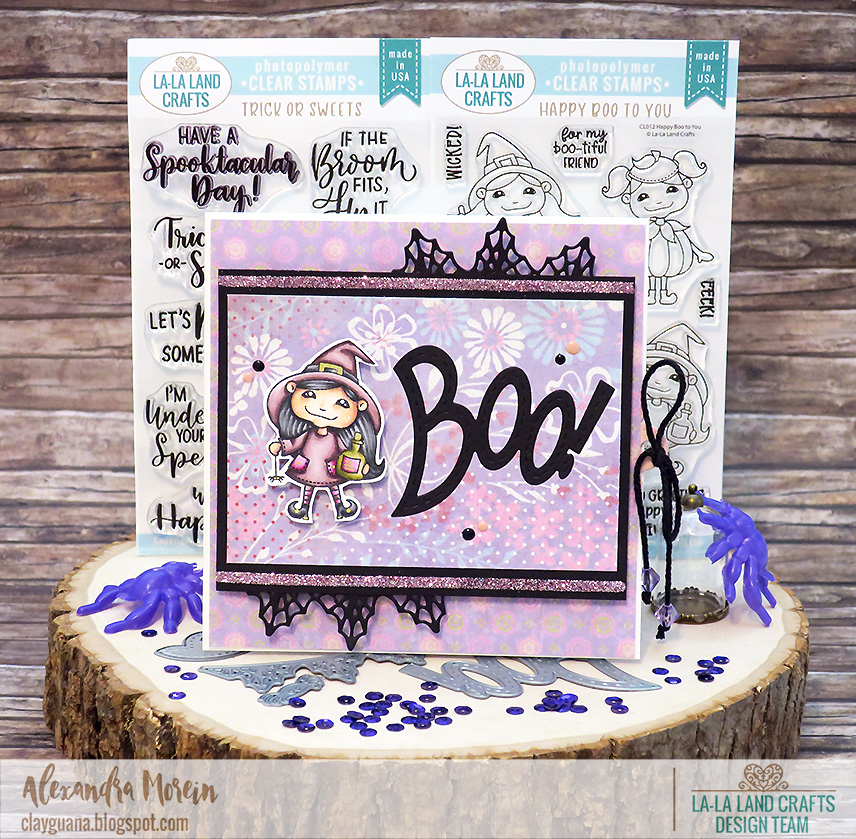
Continue to embellish the card with the stamped images and die cut elements of your choice:


The LLLC products used for creating the card above:
The image is colored with Copics:
Skin: E04, E11, E00, E000
Dress + Hat: RV99, RV95, RV93, RV91
Hair, Shoes and Hat Belt: N10, N8, N6, N4
Bottle: YG99, YG97, YG95, YG91
Pockets + Bottle Label: RV69, RV66, RV63

Have fun creating and thanks for stopping by!

Супер!
ReplyDelete