


For my another boxed card I used a stamp from La-La Land Crafts - Quill Pen Marci and it was made for the Inspiration Friday at La-La Land Crafts Blog. Our theme today is "With Love".
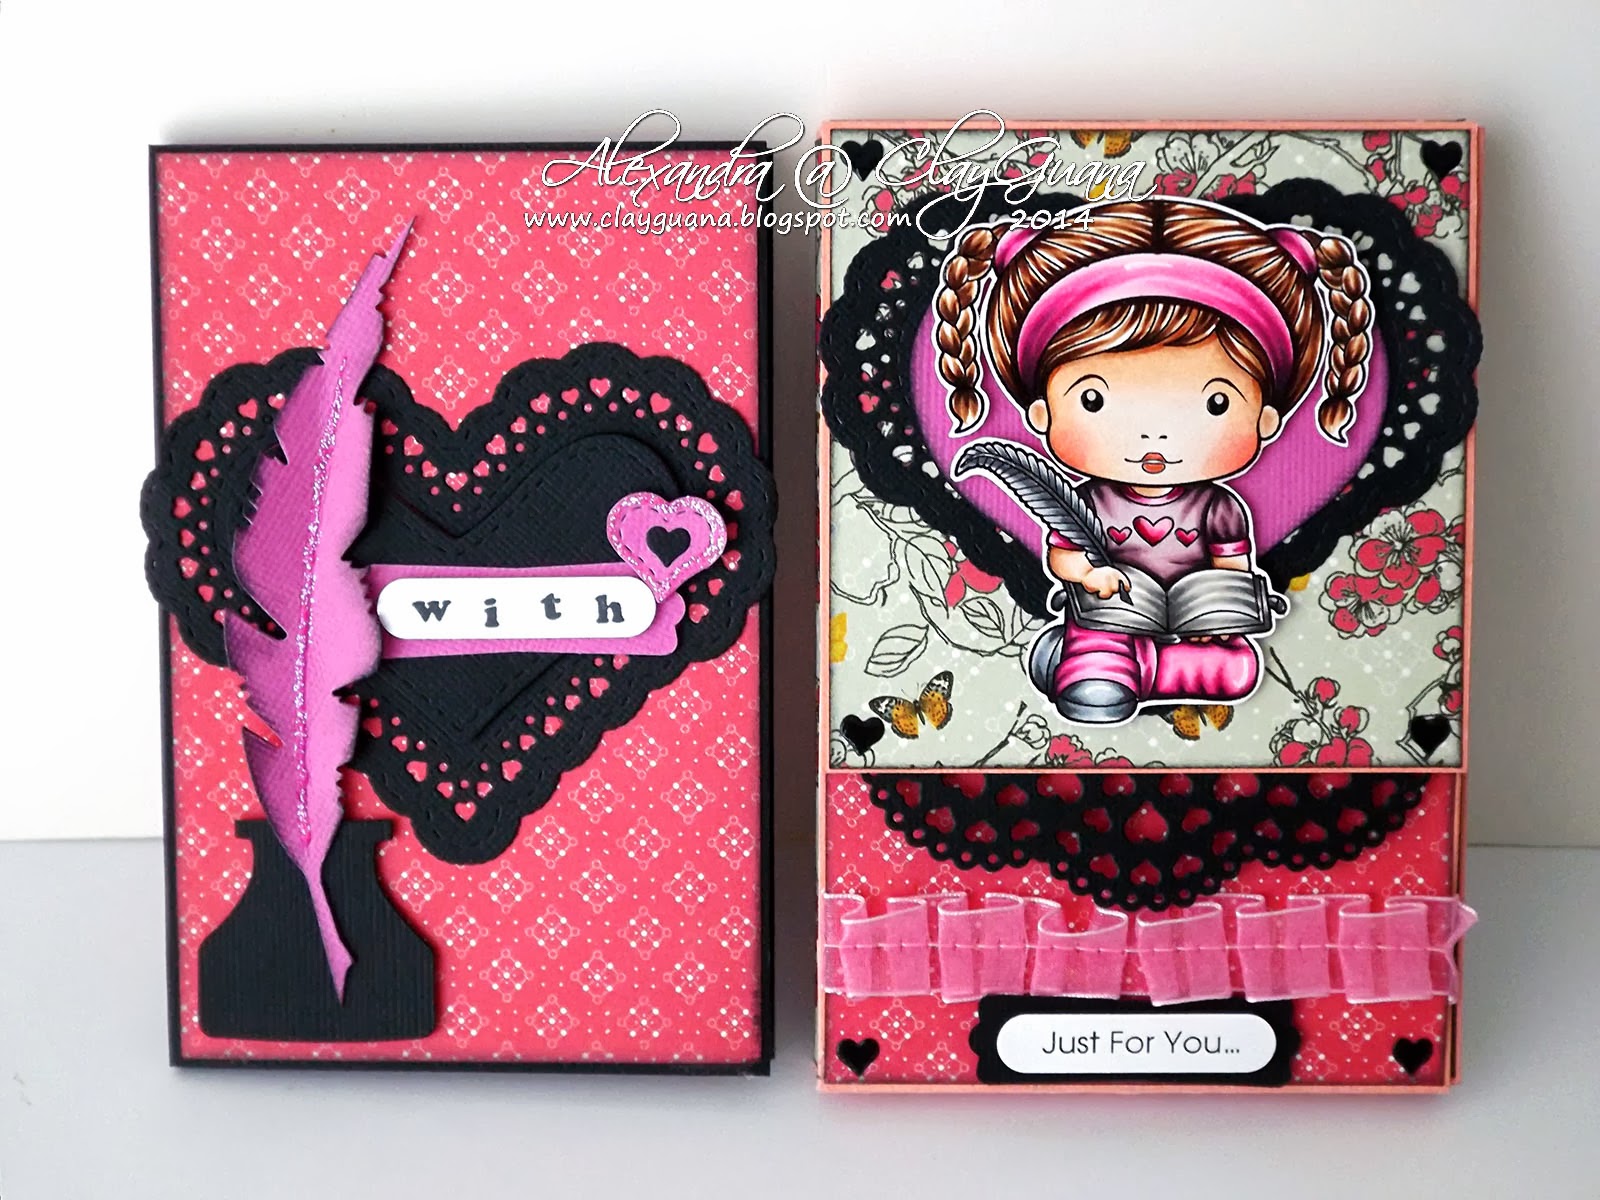

Marci is colored with Copics:
Skin: E13, E11, E00, E000, E0000, R22, R20
Hair: E21, E23, E25, E29
Book: W3, W2, W1, W0
Outfit: RV09, RV06, RV04, RV02, RV00, T5
C6, C4, C2, C1
RV99, RV95, RV93, RV91
More pics:


The LLLC dies used for this project:
I'm terrifically sorry about the pictures' quality.... Had to make them late in the evening :((
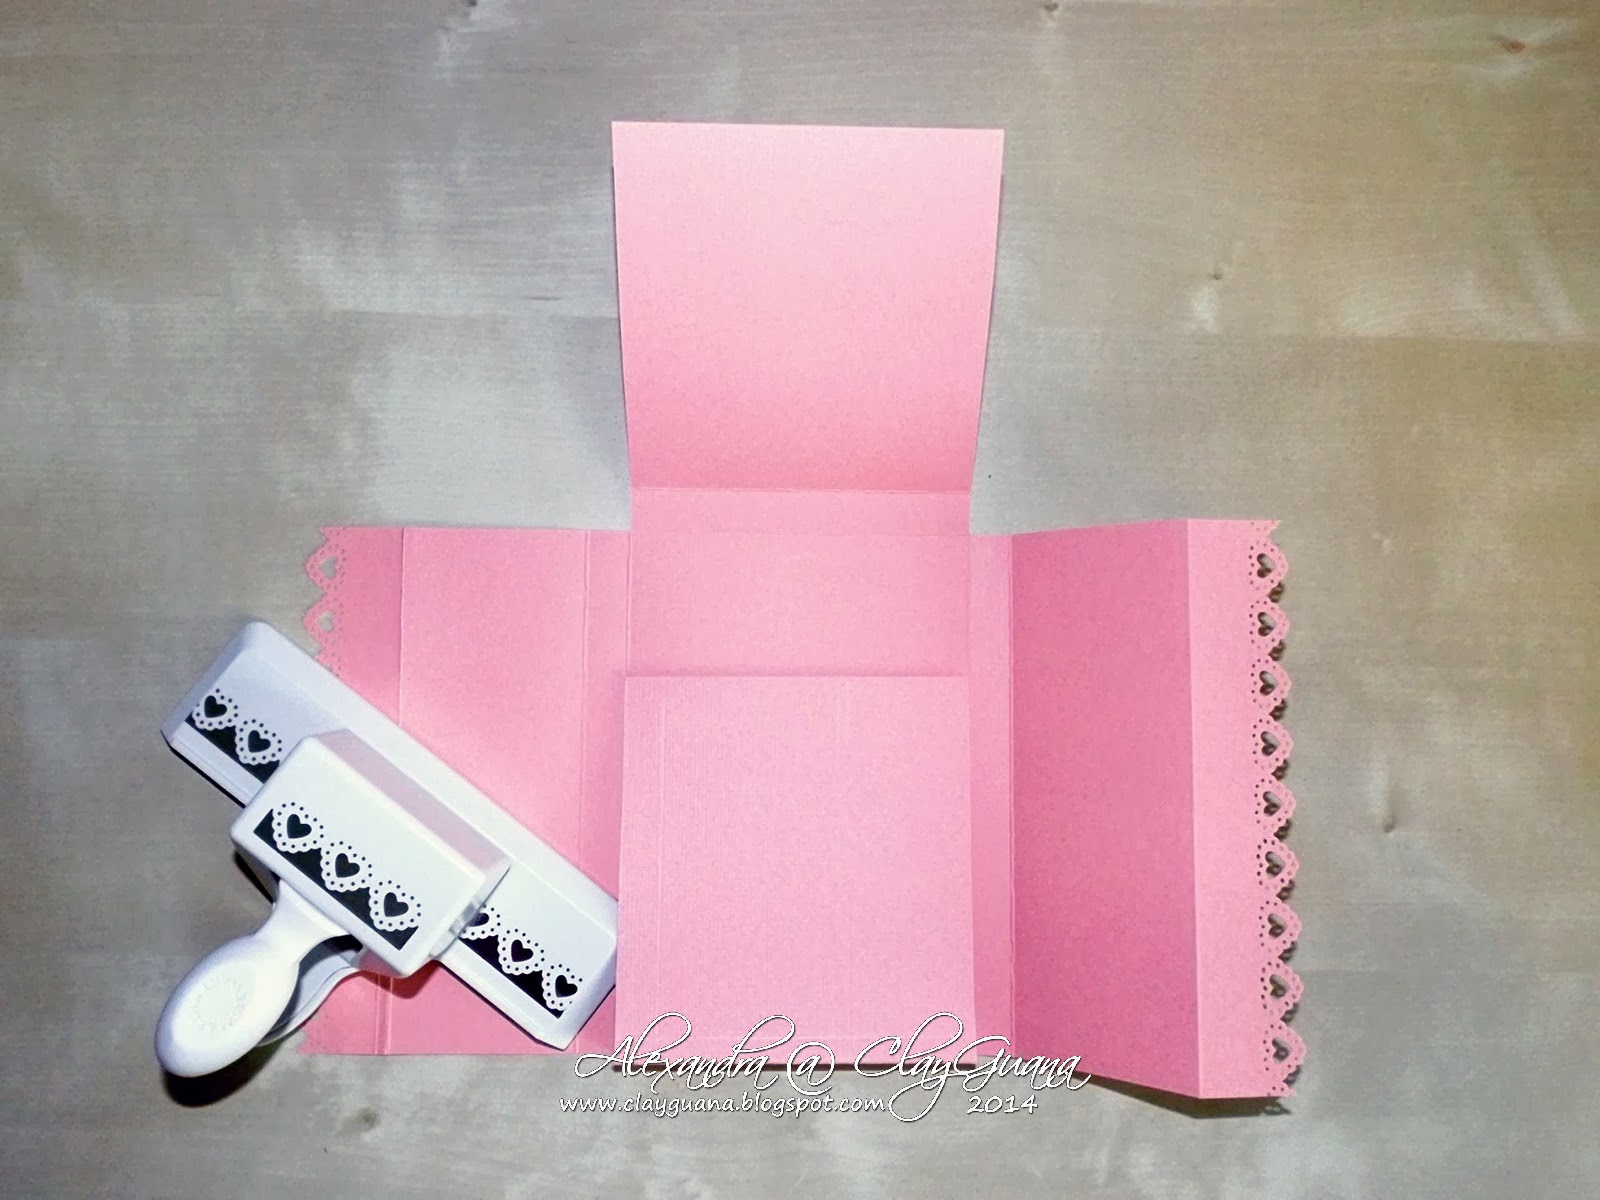
What you"ll need:
one 12"X12" cardstock of preferred color
about 5 sheets of 6"X6" DP for the box
4 additional 6"X6" DP for the card
2 magnets
Score the 12X12 cardstock as follows:

Turn the cardstock clockwise and score again as follows:

Cut off the side parts to get the following shape:

Trim the parts you've just cut out to the 4" X 4 1/4" size:

Adhere to the smaller flap of the box (from the both sides of the flap):


This is what you'll have:

Here are the sizes for the patterned paper needed to cover each of the flaps and folds (just open the image in full resolution to have a better look):

Cover everything with the designer paper (except for the parts which should have a magnet on them). Join two small magnets together, adhere on one of them (for now) a glue dot, and attach in the desired place on the inner side of the top flap:

Attach another glue dot on the second magnet (while it's still attached to the first one):

Now you can close the box. When you'll open it again, each magnet will stay on its side, perfectly placed in the right spot:

I like to secure the magnets with a small piece of tape, just to make sure it will stay in place. After doing that, glue the rest two pieces of the designer paper to the magnet flaps.

There you have it! Your box is ready!

Challenges:
Challenge 206 Valentine/Love @ Totally PaperCrafts
Wow! Today I just saw it to come back here for a closer look. Fantastic as always!; super elaborated project. Thanks a lot also for the Tuto. Magnific coloring and magnific choice of papers!. Elena F.
ReplyDeleteI would love to craft with you !!! This is really a great gift idea!
ReplyDeleteAnother fabulous creation Alexsandra!! Love your pretty design and your colouring on her is divine!!
ReplyDeleteThanks so much for sharing your gorgeous tutorial!! Such a clever idea, now on top of my wishlists of projects to make!!
Hugs Yuri xx