Friday, April 12, 2013

WorkShop @ Junior De Artist

Hello everybody!

Today I want to tell you about a wonderful art shop I've came across - "Junior De Artist". As you may know, I'm in the search for scrapbooking and art stores here, in Singapore, I've already been to several of them, and I think from the moment I've stepped into "Junior De Artist", it will be my favorite. You will surely ask "why"? I'll explain to you with a great pleasure, and even show :)

As far as know, the store was opened in 2000 and back in that days they were selling mostly punches. The boss's name is Freddy Yip, and every moment you drop by he will be around, rearranging things in the shop, teaching those who came to workshops, helping with a piece of advice here and there. Definitely, a very nice and kind man! Though the years, the range of the products in the store grew, and today it's well stocked with Hero Art, Penny Black, Stampendous, Magnolia and many other stamp brands, as well as QuickKutz dies, different cutting machines, Zutter products and every kind of cardstock imaginable.

Here are some pics of what they have and how the store looks inside:


Isn't that impressive?! 

Two days ago I went back to the store for one of their Work Shops. Agnes Tan showed us how to make 2 tier drawers easel box. This is what I made in the end of the lesson:


That will be it for now :) Hope you enjoyed this post, come back soon!

Wednesday, April 10, 2013

Bubbles Girl - Pink & Beige Color Combo

Hello dear friends!
I'm very happy that I have several new followers, thank you people for your support and interest!
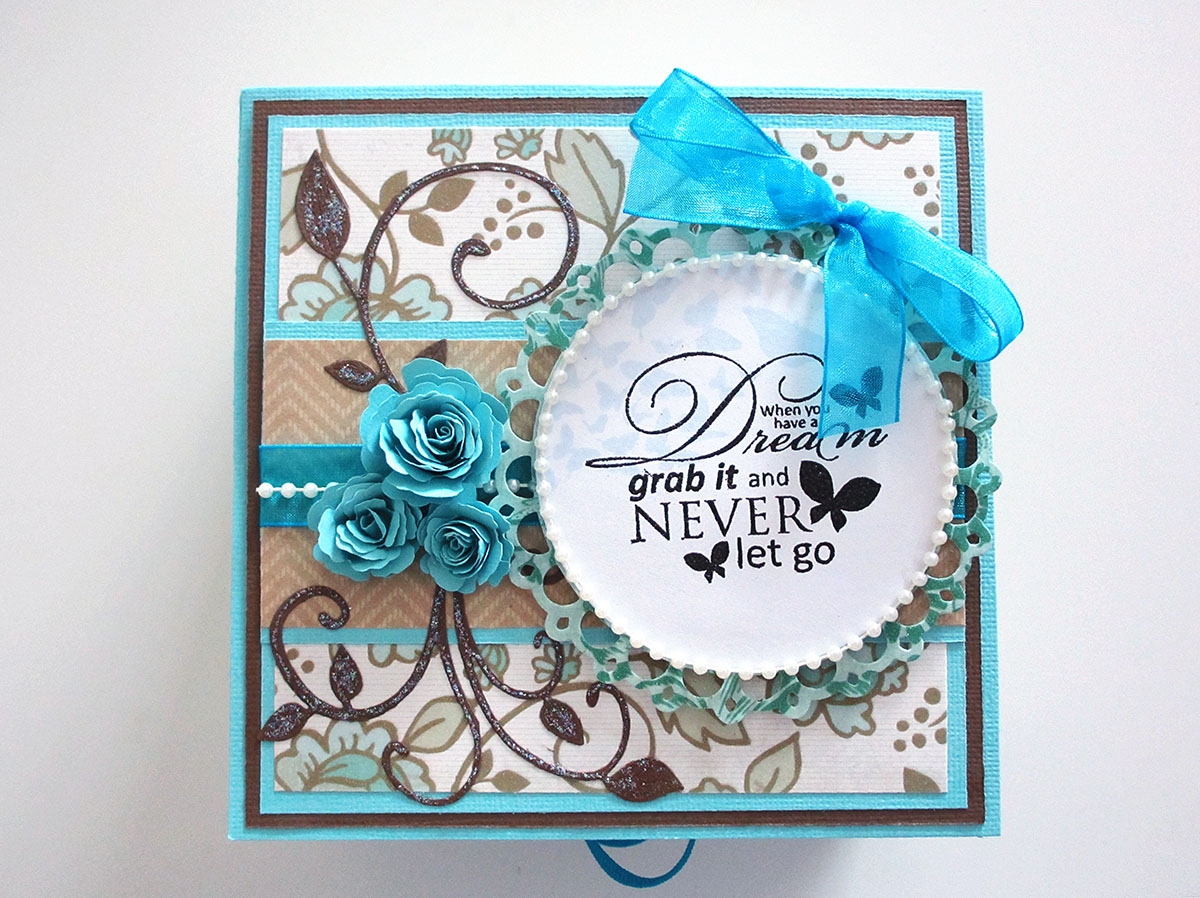
Another card is done, it took me actually two days to complete working on it. The layout was time-consuming, adding glitter may be really tricky. All the floor in my room was covered with glitter :) On the edges I applied Martha Stewart Fine Copper glitter, with the help of a Zig Glue Pen.
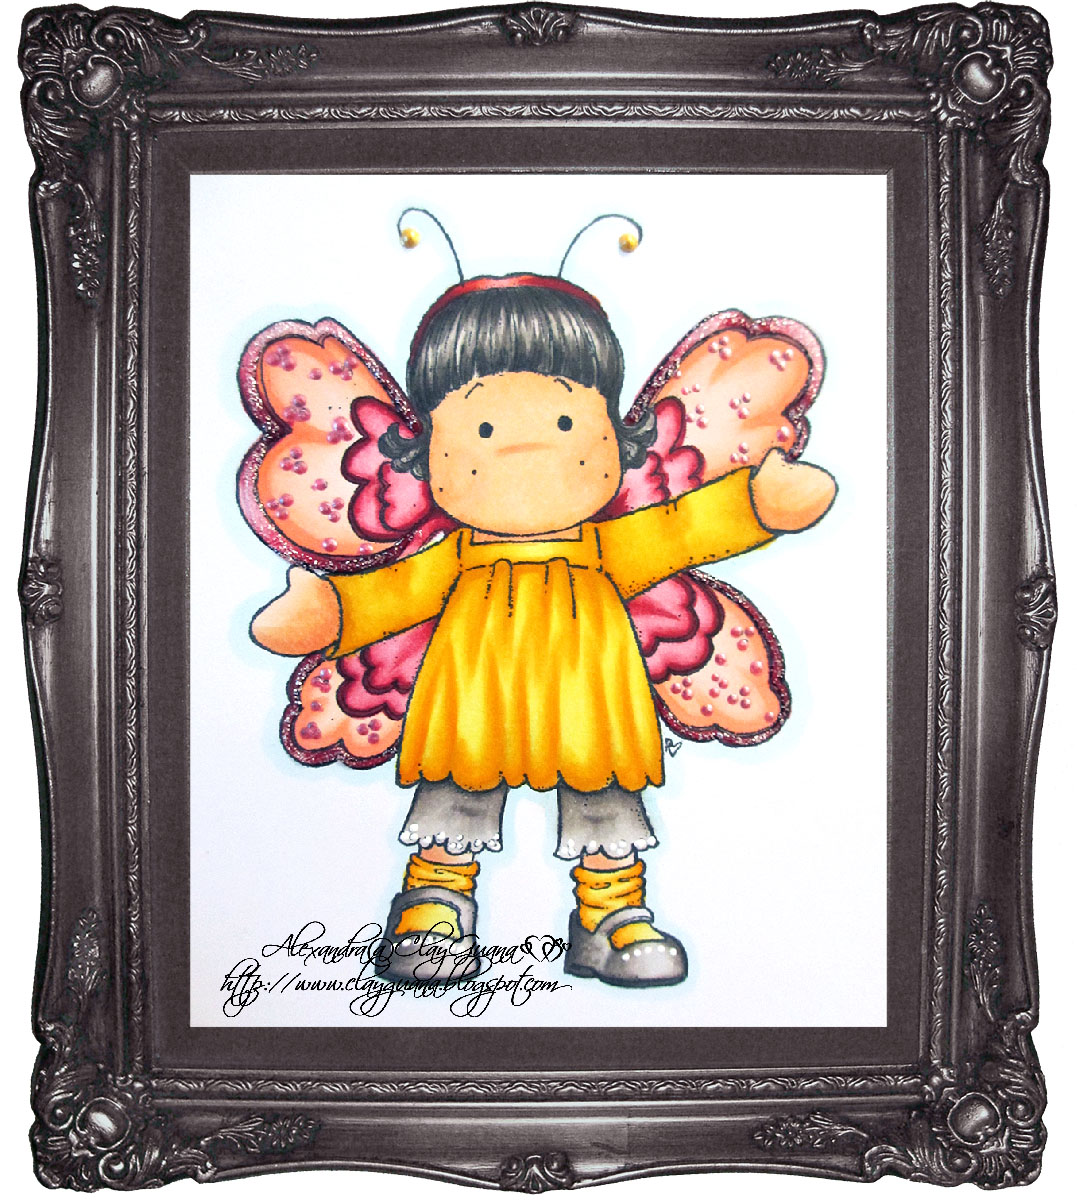
Somehow, again I used a Mo's Digital Stamp - Bubbles Girl.


Here is the list of the used colors:
Skin: E000, E00, E21, E11, R20
Outfit: R81, R83, R85, R89
Hair: Y00, Y21, YR23, E33
Chair: E21, E25, E29
Bubbles: B02, B01, B000
Floor: T6, T4, T2, T1, T0

How sould I color images, so that they will have a more pastel look?! Is the solution "always to take lighter colors"? But when I'm going over the image several times (even with the brighter colors) they go darker....

Anyway, my today's finished card looks like this on the front:


The following parts and tags may be pulled out and serve for writing down your own sentiments:


Here are a few close-ups:


The inside of the card:


The back: 


I have to share one more thing. For the first time since I moved to Singapore, I've decided to make an internet purchase. As many of you know, I love all Magnolia products, so I went for making an order from Magnolia-licious. The payment was processed on the 1st of April, the items were shipped on the 5th of April, and today (10th of April) a postman already delivered my order!!! How cool is that! Quick and safe! There are several more packages on their way and I hope they will as well be luckily delivered. For now here are my new goodies to play with:


I'm entering this card into the following challenges:
1. PaperTake Weekly Challenge - Bingo! (I chose to go mostly with the Glitter-Die Cuts-Blooms)
2. Bearly Mine Challenges - Anything Goes
3. Cheery Lynn Designs - Challenge 75 - Anything Goes (I used 2 Dies - A Laced Heart and a Border).
4. Through The CraftRoom Door - Anything Goes
5. The Ribbon Girl Blog - Anything Goes with Flowers
6. Top Tip Tuesday - Girls and Boys Come out to Play
7. Bunny Zoe's Crafts - Favorite Color Combo (my combo is pink and beige)
8. Totally Gorjuss - Anything Goes With Sparkle (I used lots of glitter)
9. MayZy Art -  Challenge 014 Sparkle
10. MelonHeadz Friends - Make it Girly
11. Creative Inspirations - Anything Goes (add Hearts)

Thanks for reading!
Have a creative and full of positive energy day!

Thursday, April 4, 2013

An Easel Shaker Card With a Mo's Image

Rise and shine lovely peeps!

Yesterday I started a new card and today I've finished it. For a long time I haven't made a shaker card, so I decided I'll give it a hand. The image I chose for the card is by Mo's Digital Pencil - 'A Bad Hair Day'. While  working on this card I found out that the most challenging part was to color the girl's hair..... She doesn't have a lot, so.... There's no room to play with the colors :)

Anyway, to those who read this and maybe thought about buying a device called Stitch Sew Quick, Hand Held Sewing Machine by Singer, I want to say: "Don't do that"!


Actually I was sure that it will be enough for adding a very regular stitch to the cards, so why spend money and buy a big regular sewing machine!? This device costs at SimonSaysStamp only 19.99$ and will be pretty satisfying for me. I found out that this machine is working only on fabric. When you try to sew paper, it just won't imitate the both-sides stitch.... It's a bit hard to explain, but it only makes holes and doesn't put a thread through those holes. So do some double thinking before you decide to buy this machine.

In my opinion (of course, it's very time consuming), but I've been using before that a regular needle tool, an Essential Paper Piercing Pack by 'Stampin' Up' and a Piercing Mat by 'W R Memory Keepers', and it worked really great for me!

 
Recently my dear husband bought me a present, a new portable free arm sewing machine by Brother (AS2730S).
I wouldn't buy this only for cards and scrapbooking back in Israel, but here in Singapore the price was very seducing, so... :)

And now back to the card. 
I chose to use light blue and violet colors. The papers are from a 6x6 Basic Grey paper pad "Sultry". 
The distress inks are by Tim Holtz - Broken China & Dusty Concord
I also used Martha Stewart punch Beaded Arcs, and lots of dies:


I made a big tag and put it in the back pocket of the card, so that there would be a place to write down a personal sentiment or a wish :)


Here's how the card looks when flat opened:


The back is very simple:


And here are several close-ups:


The flowers under the paper roses were cut from felt:


I want to enter my card into the following challenges:

1. Mo’s Digital Challenge – Challenge 179 Fabric + No’s Image
2.. AnythingChallenge – Challenge 89 Mail it
3. LoveRubberStampsChallenges – Anything Goes Challenge 46
4. PaperTake Weekly – Anything Goes
5. V’s Sweet Ideas – Anything Goes VSC #10 Challenge
6. Challenges4 Everybody – Challenge 317 Anything Goes

Thanks for reading till the end :)
Have a great day and a lovely weekend!


Monday, April 1, 2013

Tilda As A Butterfly

Hello everybody!

Now, that I'm a housewife, I'll be frequently showing you new cards and other things I'm making :)
Today I have a Magnolia card to share. I used a 'Tilda as Butterfly' stamp and it belongs to a rather old Magnolia collection of 2009, which was called "Chasing Butterflies". But who said that we always have to run after the new stamps, right? :)


Copic colors I used were as follows:
Hair: W1, W3, W5, W7
Skin: E000, E00, E21, E11, R11
Dress: Y11, Y15, Y17, Y38
Shoes & Pants: W0, W2, W4, W6
Wings: R000, R00, R11, R20 + R81, R83, R85, R89

To tell you the truth, I'm not very pleased with how the wings turned out, so what is left is to hope that practicing on other images will improve my skill :)

The layout is based on the sketch offered by MDUC blog:


And this was my interpretation of it:


I'm entering this card into the following challenges:
1) MDUC - Challenge #190 Sketch
2) The Ribbon Girl - Add Flowers
3) Crafty Ribbons Challenge - Anything Goes with Ribbon
4) Magnolia-licious - Spring Blossoms
5) Stamp & Create - Use at least 1 Die
6) 613 Avenue Create - Anything Goes with Flowers
7) Sweet Stampin' - Oh So Girly!
8) Simon Says Stamp & show - Anything Goes
9) Marvellous Magnolia - Wings
10) Lovely Hanglar or Sweet Magnolia - Butterflies or Things That Flutter
11) DL.ART - Spring
12) 7kidschallenge - Thing with Wings
13) Bunny Zoe's Crafts - Girly


Make sure to check these challenges and maybe enter your works too!
Have a wonderful day and be positive! :)

Sunday, March 31, 2013

Tiddly Inks Challenge - Grow A Little love

Hello friends!

There's a challenge taking place at Tiddly Inks and it's called "Anything but a card". I've made not a regular, but a book-card and I hope it will be OK for the challenge. The digital stamp I chose was Wryn "Grow a little Love".


Here is the list of Copic markers used for this project:
Skin - E000, E00, E11, E13, E21, R11
Dress - BG70, BG72, BG75, BG78
Hair - E11, E13, E15, E18, E29, E49
Flower Pot - E31, E35, E37, E39
Hearts and Shoes - R11, R14, R17, R24
Grass - G91, G95, G97

This is how the book looks when closed: 

The tag on the side may be pulled out:


Some close-ups:


And this is how it looks when opened:


The inside tag may also be pulled out, on it's back side there's a place to write a sentiment:


The back of the book:


I bought a very cute set of a metal stamp (with a letter "A") and a wax stick.  There are all the letters available to chose from. The result is beautiful!


One more thing I wanted to share, is that my friend Sveta is a having a blog candy, you are more than welcome to join in and try your luck in winning nice goodies:


Thanks for visiting and have a great day!

Additional Challenges I'm entering my project to:
1) Through the CraftRoom Door - Anything Goes
2) The Paper Shelter - Anything Goes
3) Simon Says Stamp - Anything Goes
4) LadyBug Crafts - Anything Goes