Saturday, October 27, 2012

Vintage Tags and a Double Peek-a-Boo Card

Evening everybody!

I was very tired after making yesterday's card (actually, it took me about 5 hours to finish it), so today I've decided to spend my time on preparing several vintage tags (I'm very satisfied with the result, by the way), and a very simple "double peek-a-boo" card.

Let me show you all these things one at a time :)

Here is the start for the tags (as you see it's a plain white aquarel paper):

 
After some distressing the tags with the Walnut Ink by Tsukineko:

 
After more distressing with Distress Vintage Photo Ink, stamping and heat embossing:
 
 
Here are four of the finished tags:


And now to the card... While surfing through tons of video tutorials on YouTube, I came across one great channel by Dawn. She has lots of great short video tutorials, each and every one of them is inspiring in the way your hands start itching and at the same moment you are ready to cut, stamp and punch :) So Dawn had this cute and simple tut explaining how to make a double "peek-a-boo" card. My result is as follows (in this card I didn't color anything and didn't use any flowers, it was solely stamping and punching):


That's it for today and for this weekend, tomorrow a new working week starts and I will hardly have time for crafting....
 
 
Thank you for visitng my blog!

Friday, October 26, 2012

Another Birthday Card - For My Dear Sister

Hello friends!

In today's card I finally got a chance to use flowers which I didn't make by myslef, but ordered from Thailand via internet site www.iamroses.com. I got the advice from my friend Tanya, and for this she deserves a big THANK YOU :)
The package with the flowers I ordered arrived yesterday and all of them were amazing!! Every single type was packed separately, with big care and love. I definitely recommend you try them by yourself and make a purchase.

Have  a look at my treasure :)


And now let's go back to a new card I've made. My sister Maria is having a birthday on the 5th of November and this is an opportunity to use one of my new Magnolia Stamps, which I recently bought from SimonSaysStamp.
The stamp I chose is called PRINCESS WELCOME TILDA.

The front of the card:


The inside:


The back:


I haven't presented the card yet, but I hope Maria will like it :)

Thanks for your time and interest in my work!

Saturday, October 20, 2012

A Birthday Card - Peggy by WeeStamps

Hello dear friends!


I'm presenting here another card, which was an order from my sis for her friend's birthday.
This time I didn't use a Magnolia stamp, though just about more than a week ago I received my new 9 (!) stamps from Magnolia 2012 Collection, which I bought at SimonSaysStamp.
The image I chose to color with my Copic Markers was a Peggy Digital Stamp by Sylvia Zet. All the stamps from her store are adorable, I purchased several of them and I really hope I'll get to coloring them soon :)

Here is a start for the card ( a colored digital stamp, die-cut with the help of Quickutz Nesting Doily Circles:


And this is how the finished card looks:

The flowers are hand made by me (the biggest one not without the help of Tim Holtz Sizzix Tattered Florals Die),  the papers are from Hopscotch 6 x 6 Paper Pad by Basic Grey.

For the first time I used Shrink Clear Plastic Sheet by Ranger to crate those tiny clear sentiment embellishments on the right (with Prima Flowers Clear Stamps ZEPHYR).
The lace border was made using the BORDER DAINTY LACE by MFT.


The back of the card:


The flowers were stamped on vellum paper, embossed with Stampendous Pearlustre white embossing powder, cut out and glued down:


That's it! Thanks for your time and interest!
I'd appreciate your comments (if you have any) :)


Saturday, October 13, 2012

Trying something different

Hello dear visitors!

All I've beed doing recently are mostly cards. This time I tried to make something different. My sister asked for sort of a wall hanging, so that she could hang it above her desk at work. It took me quite a long time to decide which form it will be, and WHAT will generally be on that hanging :)

At last I tended in the direction of birds, hearts & flowers.
I also tried to make by myself a hanger... I know, I know...  It came out a bit crooked, but I hope after some practice I cound open a factory and produce them in quantities :)

To cut a long story short, this is the result:


Here is a list of some materials used:

1. Tim Holtz Sizzix Die TATTERED FLORALS Bigz Flower Alterations
2. Tsukineko Walnut ink
3. Tsukineko SHIMMER Goosebumps Clear Texture Spray
4. Tim Holtz Distress Stain (dried marigold, tatteres rose, spun sugar)
5. Fiskars Hearts Shaped Templates
6. Tim Holtz Rubber Stamp FLOURISH 1 V3-1462

That's it :)
Thank you for stopping by!

Monday, October 8, 2012

The best Friend is Always There...

Good morning!

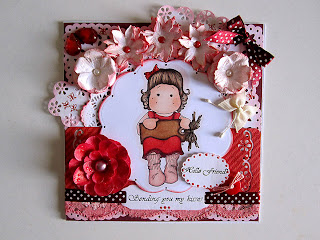
At J&C Creations there's a new challenge of celebrating friendship. I'd like to take part in it, so yesterday I spent several hours on making a card.... You already know that I love Magnolia stamps, so even here I had to use it :) It's a card for a friend whom I don't see much cuz she's living in another country. I guess to send it by post will be easier and quicker than to give her the card personally.

This time I felt like using red and bordo color scheme.
The stamped image is from Magnolia and it's called "Tilda with Tag - Message of love". Each and every one of the flowers is self-made. I used Martha Stewart Flower Doily Garden trim punch aroung the page to make a frame for the front & the back of the card.
The paper doily was made with the help of English Tea Party Doily Die by Cheery Lynn Designs (thank you, Tany Sol for letting me use this die :)).


That's it.
Thank you visiting my blog and taking interest in my cards!

Saturday, October 6, 2012

A New Day Brings A New Chance To Create

Morning all!

Just half an hour ago I've finished this new card and used in it polymer clay heart (from yesterday) and more paper flowers. This time I took some pictures while making the flower, so all the girls who were interested, may have a look.


So here is how to make the flowers (Notice, that I even didn't use water to slightly spray the flowers before crumpling them. Paper crimper did all the work):


Thanks for visiting!
Have a wonderful day!